Welcome to the most complete guide on how to plan a bike trip (or a bikepacking trip).
Contents
- Step 1: What Kind of a Bike Trip Do You Want to Do?
- Step 2: How Much Does Bicycle Touring Cost?
- Step 3: Plan a Bike Trip Based on Your Free Time and Fitness Level
- Step 4: Research Interesting Bicycle Touring Routes
- Step 5: Create a Route With One of the Popular Apps
- Step 6: Choosing the Best Bicycle for Your Cycling Adventure
- Step 7: How to Carry Gear While Bicycle Touring
- Step 8: How to Cook Food on a Bike Trip
- Step 9: Create a Bicycle Touring Gear Checklist
- Step 10: Do You Need Camping and Sleeping Gear?
- Step 11: Prepare Physically If You Need To
- Step 12: Learn Proper Bicycle Maintenance
- Bonus Step 1: Get Travel Insurance!
- Bonus Step 2: Get a Bike Fit
- Bonus Step 3: Learn the Language of the Country
- Final Words
Step 1: What Kind of a Bike Trip Do You Want to Do?
Step 3: Plan a Bike Trip Based on Your Free Time and Fitness Level

Step 4: Research Interesting Bicycle Touring Routes
Personally, this is the favorite part of planning a bike trip for me!
If you followed the step above, you now know approximately what distance you can cover on your tour. So let’s research some interesting routes and find the one to follow.
The important thing to keep in mind here is that your home does not need to be the starting point of your cycling adventure.
Related: Best Bike Racks for Cars
Instead of limiting yourself to the area close to where you live, you can hop on a train, bus, or even an airplane and explore another area or another country. Keep in mind that if you plan to transport your bike on an airplane, you will have to pack it properly and make sure not to fit within the bike box dimensions limit.
If you’re planning your first road bike tour, I recommend staying close to home just in case something goes wrong with your bike or gear. The same goes for backroads bike trips.
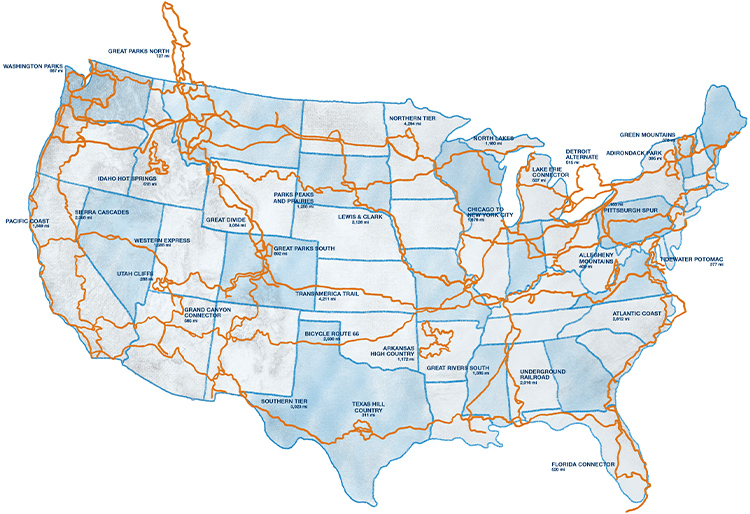
Follow a Well-Known Cycling Route

There are numerous popular cycling routes around the world ridden by thousands and even tens of thousands of cyclists every year.
The Eurovelo routes in Europe are a good example. This is a system of 19 routes that traverse the entire continent, navigating all European countries, from Scandinavia to Turkey. This makes bike trips in Europe a lot easier.
Related: Cycling Tour Guide: Across Estonia in a Week
These routes will take you through the most scenic roads in a country, showing you the most important places. They’re also usually nicely marked, so they’re pretty easy to follow. There’s also great infrastructure along these routes, including hotels, camping spots, towns and cities, shops, and more.
That makes them a great choice for touring beginners.
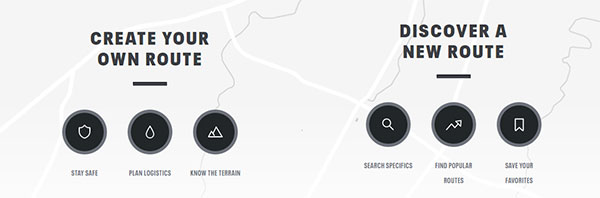
Step 5: Create a Route With One of the Popular Apps
Step 6: Choosing the Best Bicycle for Your Cycling Adventure
Now that you know what kind of a route you want to do, you can figure out if the bicycle you have is suitable for such a trip or if you need to get a different type of touring bike.
When looking for a touring or a bikepacking bicycle, the main characteristics you should focus on are stability, durability, and comfort. In most cases, speed is less relevant.
The reason is that you will be spending hours on the saddle every day, so you need a bicycle that puts your body in a relaxed position that you can easily maintain for a long time.
Depending on what type of cycle adventure you intend to do, there are three types of bicycles you can choose from:
Road Touring Bicycles
These look like standard road bikes, but feature a more upright geometry and typically come with front and rear racks, as well as fenders. They usually roll on 700c wheels that are not too wide, so they are efficient on paved roads.
Related: Different Types of Road Bikes
Adventure Touring Bicycles
This type also looks similar to traditional road bikes but comes with burlier 650b wheels that are more suitable for off-road riding. Lately, many travelers have been choosing gravel bicycles for this purpose, as they check all the necessary boxes.
Bikepacking Bicycles
Lastly, if you plan to do a mountain bike trip, on singletracks or dirt roads, you should get a bikepacking bicycle. Basically, these are mountain bicycles (rigid or hardtail) with numerous eyelets to mount panniers and bags, and with a relaxed geometry.
Main Features of Touring Bicycles

Though touring bicycles look very similar to road bicycles and bikepacking to mountain bicycles, they come with some crucial differences.
Some main characteristics that all touring and bikepacking bicycles should include:
- Long wheelbase for more stability.
- Upright geometry for a relaxed riding position.
- Wider and more durable tires.
- Strong wheels with at least 32 spokes.
- A large number and a wide range of gears.
- Numerous eyelets on both the frame and the fork.
- Accessories such as racks, fenders, a kickstand, frame bags, etc.
Related: Best Touring Bikes
To sum, in theory, you can use any type of bicycle to go on an unforgettable adventure. However, if you want to feel comfortable and get the right tool for the job, you should invest in a bike that is made specifically for this purpose.
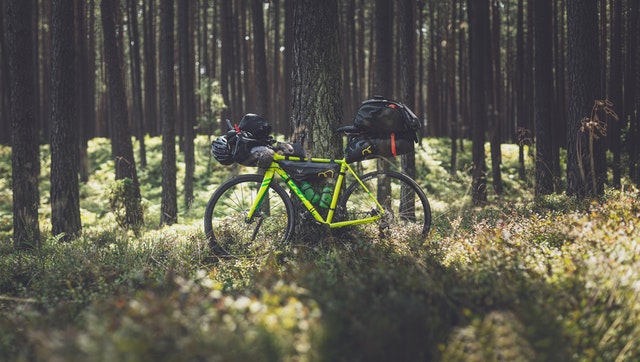
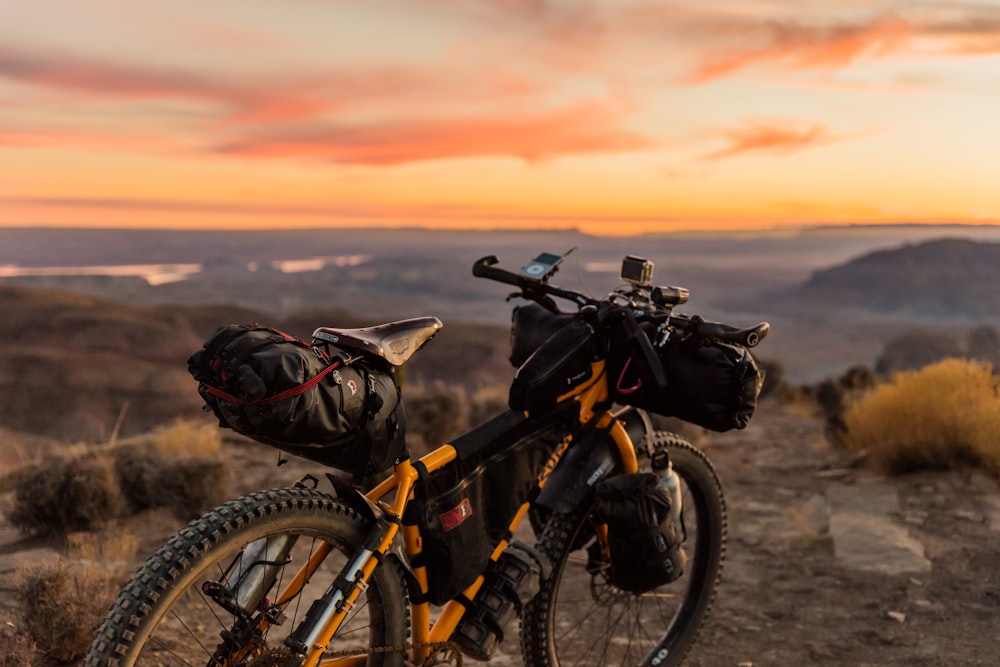
Step 7: How to Carry Gear While Bicycle Touring
You have a bicycle, you’ve planned your trip, chosen the route, now you need a way to carry all of your necessities on your bike.
There are two options you can go with when it comes to touring bags. Both options have pros and cons and are better or worse for specific types of cycling adventures.
Bicycle Touring Panniers
Bicycle touring panniers are large, bulky, and heavy, but they allow you to carry a lot more gear than frame bags. You can usually carry a total of four panniers on your bicycle at the same time—two on the front and two on the back. This is a great option for road touring, but not so good for off-road tours.
Bikepacking Frame Bags
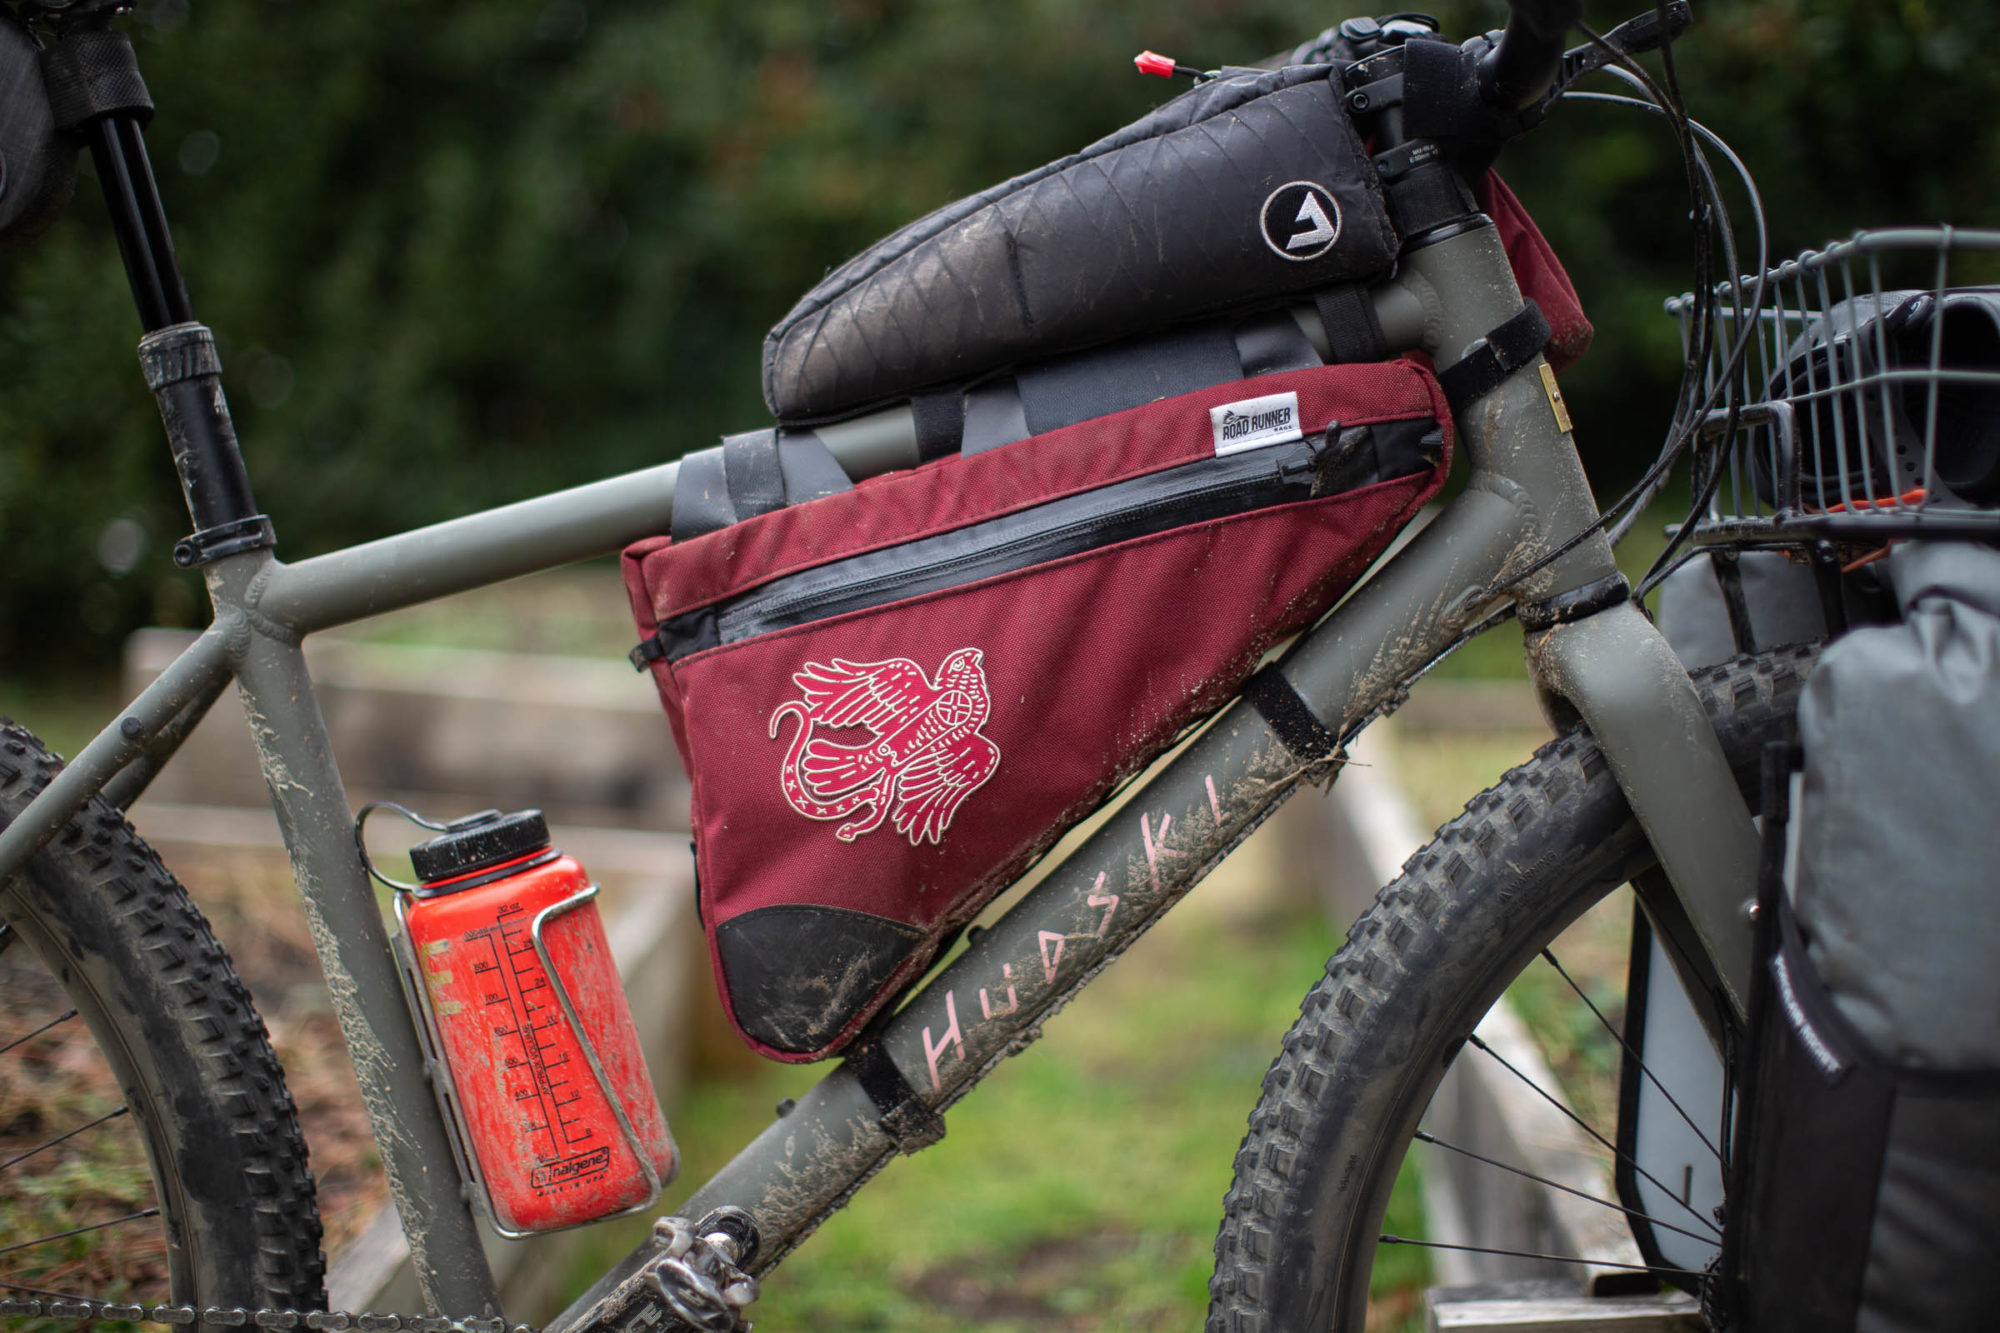
Bikepacking trip frame bags, as the name tells you, fit around the frame of your bicycle. Bike travelers usually go for a saddlebag, a handlebar bag, and a frame bag. Sometimes they even combine this setup with a pair of panniers to maximize their carrying capacity. Frame bags are lighter than panniers, but they are also smaller, so you have to travel lightly. They are the go-to choice for light and ultra-light touring adventures.
Related: Best Bikepacking Bags
After your bicycle, your panniers/frame bags will be the most important piece of equipment on your tour. Therefore, they should be well-built and made from durable materials so they don’t fall apart mid-tour (I’ve had that happen to me, and it’s not fun).
Bicycle bags for long-tour bike trips should meet the following criteria if you want to avoid having headaches:
- They should be 100% waterproof, with sealed seams.
- Easy to fit on and remove from the bicycle.
- A stiff, reinforced backside that rests against the rack.
- Made from durable materials.
- Have great reviews online and a proven track record.
- Don’t have too many zippers and compartments that could break or unstitch. The simpler the better.
There are many different manufacturers out there who specialize in making amazing bicycle panniers and frame bags.
However, there are a few names that you will repeatedly hear world bicycle travelers ramble about with excitement anytime you talk to them on this topic. These are:
- Ortlieb
- Crosso
- Arkel
- Apidura
- Blackburn
- Topeak
- Thule
- Axiom, and a few others.
If you plan to do long-distance touring, you won’t make a mistake if you get a set of panniers or bags from one of these manufacturers. Their products have been tried and tested time and again, in the harshest of conditions.
Personally, I’ve had a phenomenal experience with Ortlieb and Crosso bike touring panniers and Apidura frame bags. But I’ve heard great things about the other brands as well.
Step 8: How to Cook Food on a Bike Trip
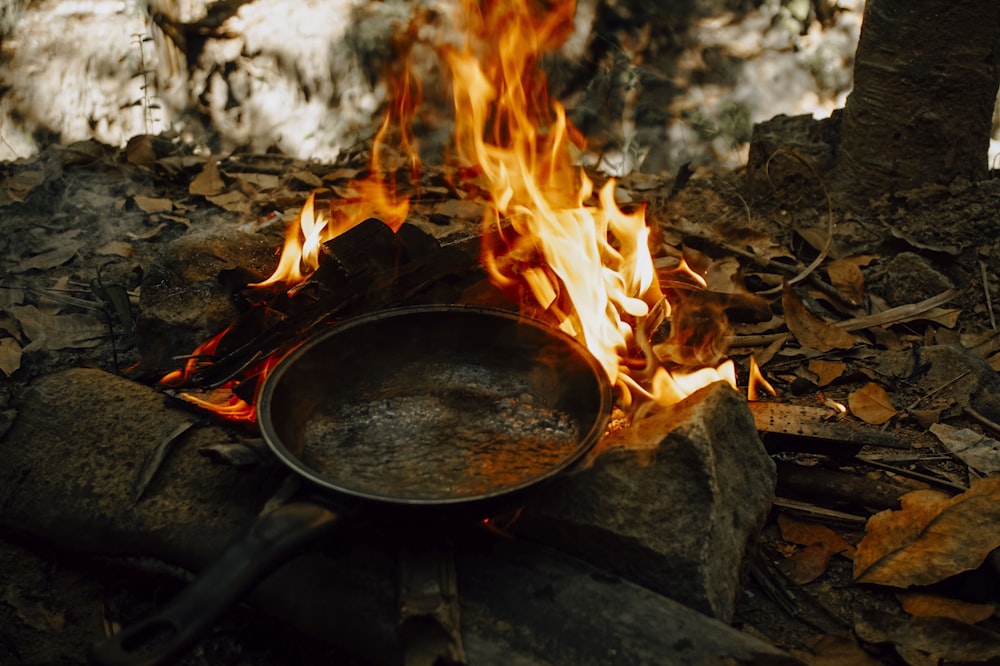
To cook or not to cook, that is the question.
Depending on the type of bicycle trip you want to do and the area in which you plan to ride, you might choose to cook your own food or eat at restaurants or convenience stores.
Your decision about whether or not to cook your own food will be influenced by two main factors: budget and weight.
Cooking your own food is the cheapest option, but you will have to carry a stove, fuel, and cooking equipment, which can add up to 10 lbs. of weight to your gear, or even more.
If you do end up making your own food and/or bonfire make sure to put it out before leaving (and picking up your trash).
The hierarchy of food-related costs for bicycle touring and bikepacking trips goes something like this:
- Eating at restaurants: The most convenient but the most expensive option.
- Eating sandwiches and ready-made meals from supermarkets and convenience stores: Less expensive, but still very convenient. Not as healthy nor as tasty as the next option.
- Buying groceries and cooking: The cheapest option by far. Requires more effort and planning, as well as carrying more weight.
So, if you want to prioritize convenience, bring a credit card or a lot of cash and eat at restaurants. If, however, you want to stretch your budget as much as possible, cooking is the way to go.
There are times when you won’t have a choice but to prepare your own food. If you’re bikepacking in remote areas, you won’t have the option of visiting restaurants or well-stocked supermarkets and stores. The same goes for developing countries with poor infrastructure.
As a general rule of thumb, if you’re not passing through a large village or a town at least once a day or once in two days, it’s advisable to carry cooking equipment.
Types of Camp Stoves
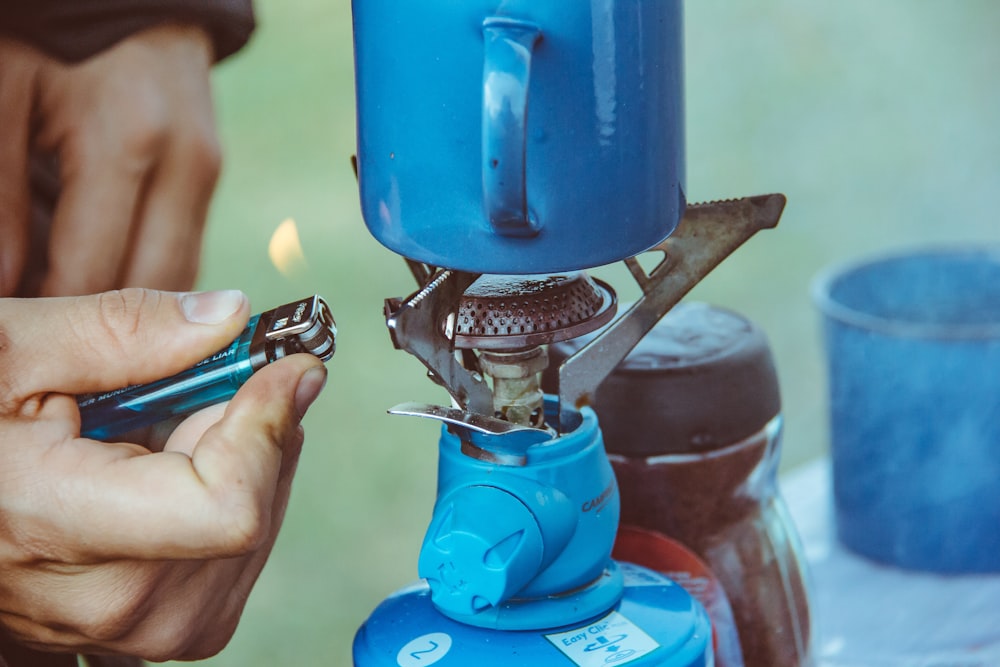
When it comes to cooking equipment for bicycle touring and bikepacking trips, we can classify it into three main groups:
- Canister stoves: These are lightweight and easy-to-use stoves that don’t take too much space. They usually screw on top of gas canisters filled with isobutane or propane.
- Liquid fuel stoves: These stoves connect to refillable bottles that can carry different types of liquid fuels, such as white gas, kerosene, unleaded, etc. They are heavier than canister stoves, but more versatile, especially if you’re traveling in remote areas.
- Alternative-fuel stoves: These stoves use fuel pellets, wood, alcohol, and other types of fuel. They’re very lightweight but not as convenient as the two other types.
In addition to carrying a camp stove and a source of fuel, you need to carry other cooking and eating equipment. Some of the things I always carry that might also work for you include:
- A big pot with a lid (up to 2.5L)
- A metal cup
- Some detergent
- A lighter
- A pocket knife
- A spork
- Windscreen for your camping stove
Bear in mind, these are just the essentials for me. You might make do without some of these things, or your list of essentials may be twice as long.
When you plan a bike trip for the first time, you’re bound to make mistakes. With each subsequent trip, you’ll find it easier to define your priorities and carry only the essentials.
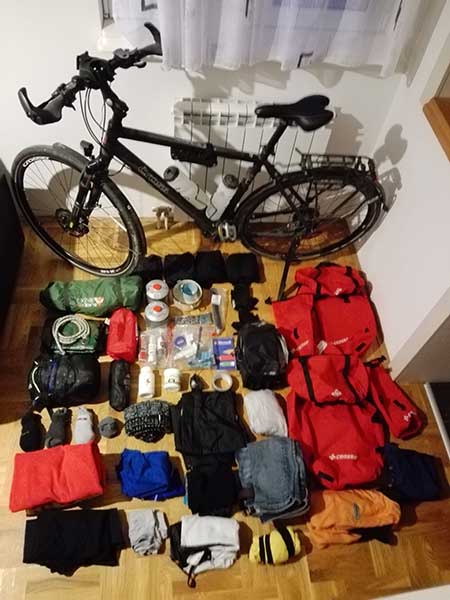
Step 9: Create a Bicycle Touring Gear Checklist
The next step when planning a bike trip is to create a touring gear checklist.
Traveling on a bicycle is a minimalist undertaking. While on the road, you’ll usually have access only to bare necessities. You need to be able to carry your entire home in a pair of panniers and/or frame bags. That means your list of cycle touring equipment will be quite short.
The good news is that the list of bike touring gear does not get longer with the length of your trip. You’ll need to carry the same amount of stuff for a 7-day trip, as well as for a 7-month trip.
Here are some of the things that you can find on and around my bike and in my panniers when I’m bike touring.
On-Bike Clothes
Note: The list can change depending on where I’m riding and the season.
- Two or three pairs of cycling shorts
- A few pairs of wool or synthetic socks
- Two or three pairs of cycling jerseys or dry-fit t-shirts
- Cycling helmet
- Cycling gloves
- Rain jacket and rain pants
- Long-sleeve shirt or a light jacket
- Down jacket
- Bandana
Off-Bike Clothes
Note: The list can change depending on where I’m riding and the season.
- Comfy shorts
- Comfy pants
- Several pairs of underwear
- Sandals or flip-flops
- One or two t-shirts
- A nice shirt for going out
Bike Tools and Spares
Note: Depending on where you ride, you might need to bring more spares.
- Tire patch kit and tire levers
- Spare tube (or two)
- Mini-pump
- Multi-tool
- Zip ties
- Chain lube
- Duct tape
Camping Gear
Note: This is just camping gear that works for the majority of my trips. You might use a hammock instead of a tent, or any different type of setup.
- Sleeping bag
- Inflatable sleeping pad
- Tent
- Ground cloth
- Sleeping bag liner
- Stove
- Cooking equipment
- Personal eating utensils
Personal Items
- Towel
- Pocket knife
- Toiletries
- Lightweight cable lock (for quick stops)
- First-aid kit
- Flashlight
- Sunscreen
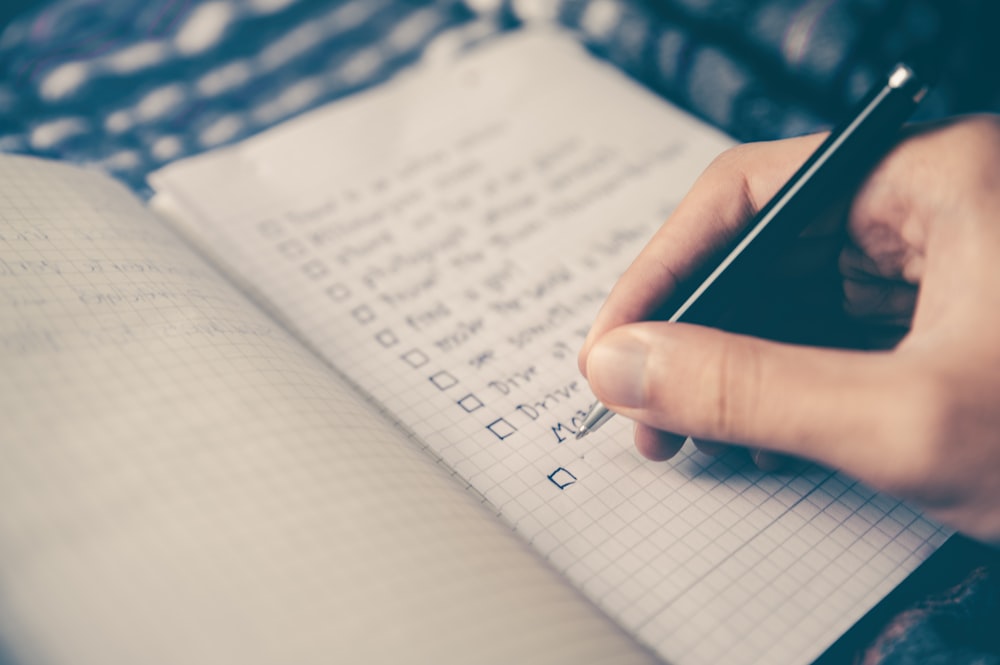
- A pen and a notebook
- Waterproof document sack
- Lip balm
- Powerbank
This is a list that works for me, that I tailored to fit my needs after years of traveling. When you plan a bike trip for the first time, you’re bound to make mistakes.
Unless you’re perfect, you’ll likely bring too much stuff or forget to bring something that you’ll need frequently. After a few trips, you’ll have a much better idea of what you should pack in your bags and what you should leave at home.
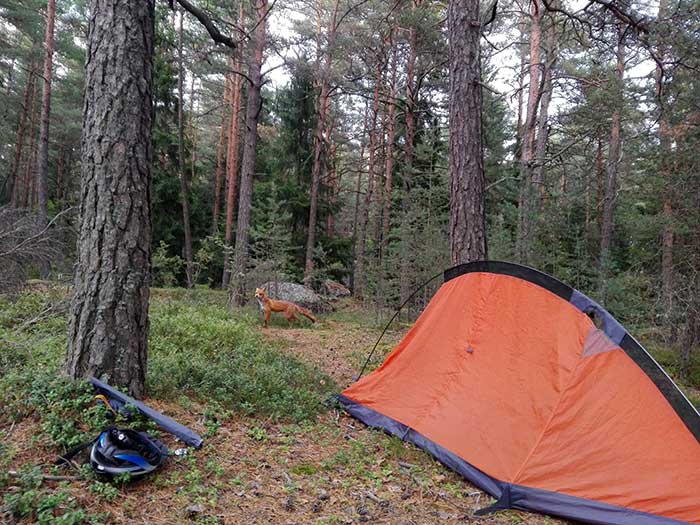
Step 10: Do You Need Camping and Sleeping Gear?
If you plan to camp, you need to get a tent and sleeping gear. Determine what type of camping equipment you need, depending on the season, temperature, rain, duration of the trip, etc. Keep in mind that this is important stuff that you don’t want to skimp on it.
The camping equipment you bring with you will be your home for the remainder of the trip, so you want to feel comfortable and safe.
Camping in a tent is not the only option you have for sleeping outside. There are a few other lighter and just as popular solutions:
Tent
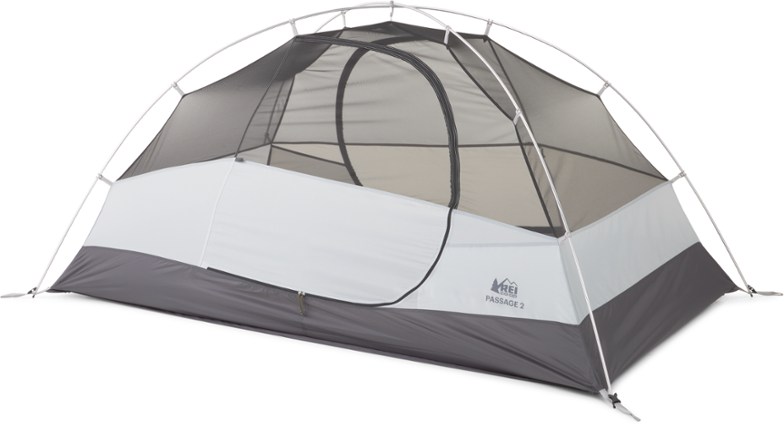
A tent is by far the coziest and the most comfortable way to camp. You get excellent protection from the elements, bugs can’t get in, and in most cases, you have a decent amount of livable space. It’s like a pop-up home!
The only trade-off for bringing a tent with you is the weight and the time you need to set it up. If you’re trying to travel as light as possible, you might not like the additional 1–2kg a one-person or two-person tent adds to your setup. In all other cases, this is completely acceptable.
The price is another potential drawback as tents can get quite pricey. Despite that, it’s the most common choice of bicycle tourers and bikepackers around the world, including me.
Unless you’re traveling in extreme weather (snow blizzards and severe storms), you should be looking at getting a three-season tent. These tents strike a balance between weight, protection, and price. They have an inner mesh construction that will protect you from bugs and keep the tent well ventilated and a rainfly that will protect you from the wind, rain, and snow.
If you don’t mind carrying some additional weight and spending a bit of time to set up the tent in the evening, this is the option I recommend and use the most.
Tarp

A tarp is one of the most versatile types of camping equipment, but it comes with some drawbacks as well.
It gives you complete freedom to set it up however you want. If there’s a lot of wind and rain, you can slant it right down to the ground and get excellent protection. Otherwise, you can raise it up and get tons of livable space. You can also slant the tarp against the wind and move it around if the wind direction changes.
However, a tarp will not protect you against mozzies and other critters. You’ll be completely exposed, which is a plus for some bike tourers, but a deal-breaker for others.
In general, tarps are relatively lightweight and inexpensive, but it takes some time to figure out how to set them up properly and refine your knot-making skills.
Bivy

A bivy is by far the most lightweight shelter you can find and my least favorite one. Basically, a bivy is a weatherproof sack that you put over your sleeping bag and crawl into to go to sleep.
One of the things I don’t like about them is the perspiration. If your bivy does not have good breathability, your sleeping bag can get damp in the morning from all the perspiration that had nowhere to go.
However, there’s no doubt that bivy sacks save a lot of weight and give you a unique chance to sleep under the stars.
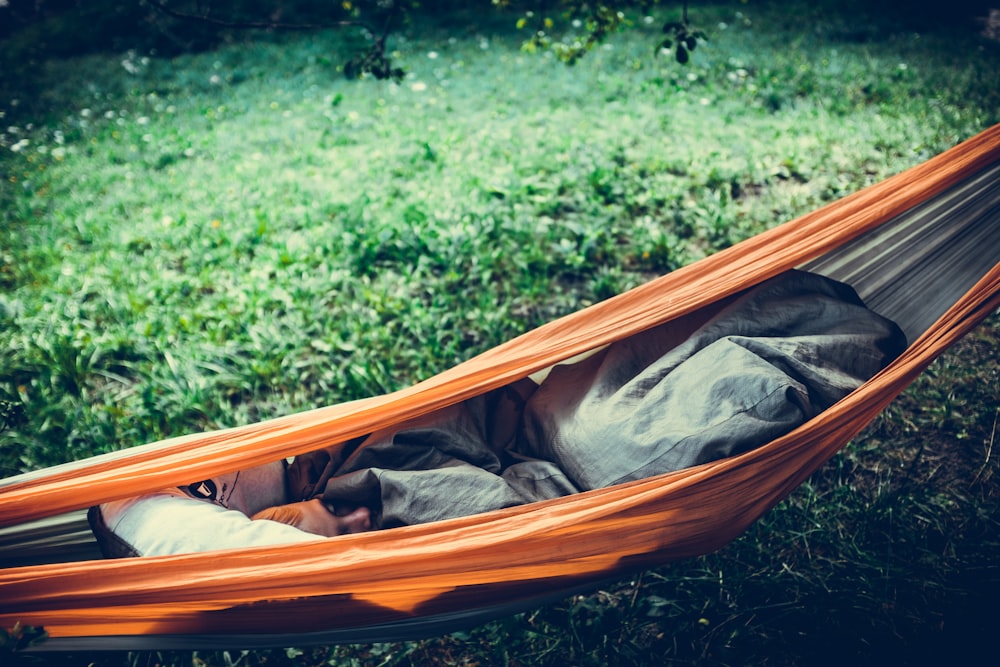
Hammock

Last but not least, a hammock is a unique type of shelter that can be the perfect solution in certain cases. A hammock is essentially a hanging bivy, which has its upsides and downsides. If you combine it with a tarp and a bug net, you can get pretty good protection from critters and the elements.
Hammocks keep you up and away from the ground which is a plus if you’re traveling during the rainy season or in areas that are especially damp.
Sleeping above the ground will also keep you away from any animals that roam beneath you. I’ve learned this is especially important in areas with a high wild boar population.
Though, keep in mind that getting a good night’s sleep in a hammock takes some getting used to. And there are some dangers that come with sleeping in a hanging sack—such as injured pride, or worse.
Step 11: Prepare Physically If You Need To
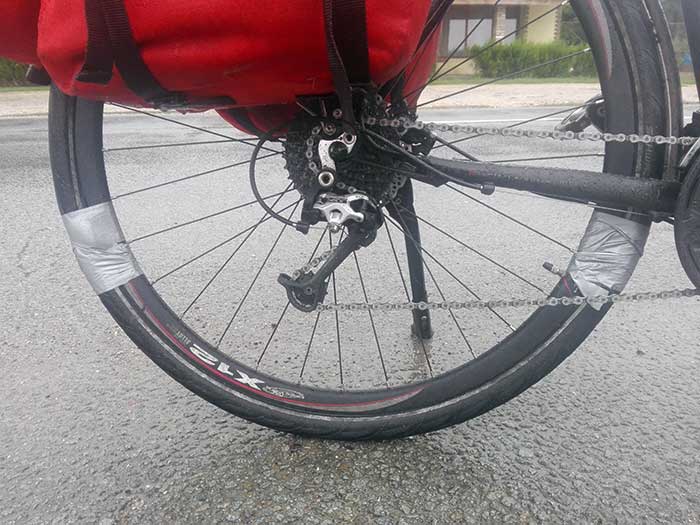
This is a very important step when it comes to planning your bike trip. It can make or break your adventure. You need to be ready to do regular maintenance on your bike and do small repairs when necessary without relying on others.
Some of the most important stuff you should learn how to do include:
- Cleaning and lubing the chain
- Replacing the chain
- Repairing and changing a flat tube
- Adjusting the derailleurs and brakes
- Replacing a derailleur hanger
- Replacing spokes and truing the wheels
This might seem like complicated stuff if you’ve never done it before, but it really isn’t. You can do all of it with very basic tools, such as a high-quality multitool, and you can learn how to do all of it by watching YouTube videos.
Related: Bike Repair Kits (Includes a checklist of must-haves)
 This is a must if you’re traveling to a foreign country. Bicycle touring is safe, but there are risks. You never know what will happen and oftentimes you have no control over some things. Travel insurance is cheap, getting treated without it is very expensive.
 Get a bike fit before a long trip to feel more comfortable on the bike and avoid injuries, pains, or aches. In most cases, common injuries on the bike, such as knee or back pain, are caused by a bad riding position.
Any discomfort you feel on your regular rides will become ten times worse when you’re on a bike trip. All you will do every day is sit on the bike and turn the pedals, so you need to make sure that you’re not doing your body any harm.
Read more about the importance and how to fit the saddle, handlebar, and other aspects of your bike.
 Last but not least, if you’re traveling to a country that you don’t know the language of, put some effort into learning some basic words and phrases.
Learn how to say “Hello,” “Thank you,” “I’m sorry,” as well as how to ask for directions. The locals will appreciate it, they will usually go out of their way to help you, and you’ll have a much better time not feeling like a complete alien in a new country.
Final Words
Congrats on coming this far and learning how to plan your own bike trips!
As you can see, even though the whole process seemed complex and daunting in the beginning, you don’t really need much to start traveling on two wheels.
Hopefully, this guide has answered any questions you might have had and cleared any remaining doubts. All there is to do now is get a bike, purchase some gear, pack your stuff, and hit the road with a big smile on your face!
Dusan,
Thanks a million. I’ve only been riding my handtrike for about a month but I am itchin to take my first tour. Do you have any additional advise for a handtrikeer?
Larry
You’re welcome, Larry!
I don’t have any specific advice for touring on a handtrike, but what I can say is to just give it a try! Prepare, but don’t overthink. Go on a short overnight trip for starters, see what works for you and what doesn’t, and continue from there. And remember to have fun, don’t take it too seriously! Cheers!
Many, many thanks, Dusan. I learned a lot!
Mike.
Hi Mike,
Thanks for the feedback! Have a great bike trip!
I appreciate this article about bike trips. I am hoping to go on a trip next year. When I go on a bike tour, I’ll be sure to consider these tips.
It was really helpful when you said guided tours will help you with carrying your stuff. My brother wants to go on a bicycle tour. I’ll make sure to pass this information along to him so that he can know more about bike tours.