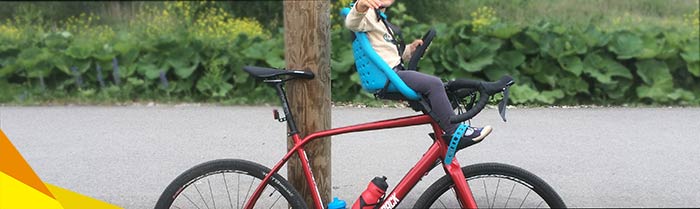
Taking your child along on bike rides at an early age is one of the best ways to introduce them to cycling and help them develop a love of active lifestyle and the outdoors.
Child bike seats are the best way to accomplish this. They make it possible to talk to your child while riding and allow them to participate in the ride, rather than just be a passenger.
However, choosing a baby bike seat is not an easy task, especially with the daunting selection on the market and all the different types and kinds you can choose from.
But don’t worry, we’re here to make the job easy for you and answer any questions you might have.
Is your bike suitable for carrying a bike seat? Is front-mounted better than rear-mounted? What features and accessories to look for?
Find out everything in our detailed guide below!
Contents
Before We Begin: Can You Fit a Child Bike Seat on Your Bike?
 What is needed to fit a seat to a bike? This is one of the most common questions parents have. Not every bike in your garage is a good candidate for a child bike seat.
Some types of bikes can take any type of child seat, others can only take one type, while there are also those that are not compatible with any.
For example, hybrid, city, or touring bikes are the best choice for mounting a bike seat. If you have one of these, finding a suitable child seat model will be easy.
On the other hand, carbon bikes, full-suspension mountain bikes, and road bikes will make the process a bit more challenging for you. But that does not mean it is impossible to find a suitable child carrier.
Therefore, before buying a child bike seat, you have to make sure that your bike is compatible with one and then determine what type to get.
Step #1: Choosing the Right Type
In order to choose the right type of child bike seat for your bike, you should first be familiar with all of the types out there. Here are some of the main characteristics that you should be familiar with and that you cannot make the right choice without.
Mount type: |
Front-Mounted Handlebar |
Front-Mounted Saddle |
Rear Rack-Mounted |
Rear Frame-Mounted |
Seat example: |
Thule Yepp Mini | Mac Ride | Thule RideAlong | Hamax Caress |
Mounting place: |
Bellow the handlebar | Mounts to the top tube or between the handlebar and seat post | Bike’s seat tube | Bike’s rear rack |
Rider age and weight: |
9 mo. – 3 yrs. Up to 33 lbs | 2 – 5 yrs. Up to 48 lbs | 9 mo. and above. Up to 48 lbs | |
Pros: |
Easy conversation, child in sight | Child in sight, easy to mount, conversation possible | More advanced features, better for older and taller kids | |
Cons: |
Not suitable for older children, gets into rider’s way | Not good for very young children, no straps or backrest | Child not in sight, heavier than other types | |
Bike recommendation: |
City, hybrid, trekking, and touring bikes | Full-suspension bikes and Step-through frames | Road bikes, city, hybrid, touring | |
Best for: |
Young kids and not too tall riders | Not very young or very old toddlers | Older and taller children, long rides, tall parents | |
Now that you’ve determined which child bike seat type meets most of your requirements, it’s time to find out whether or not your bicycle is compatible with it.
Let’s take a look at some of the main requirements that need to be met for all four types: 1) Front-mounted handlebar, 2) Front-mounted saddle, 3) Rear frame-mounted, and 4) Rear rack-mounted.
Step #2: Assessing Bike Requirements
— Front-Mounted (Handlebar) —
In order to mount a Front-Mounted Handlebar type child bike seat, you need to consider two main factors:
- Does your bike come with a threaded or a threadless headset?
- What’s the distance between the handlebar and the seat tube on your bike?

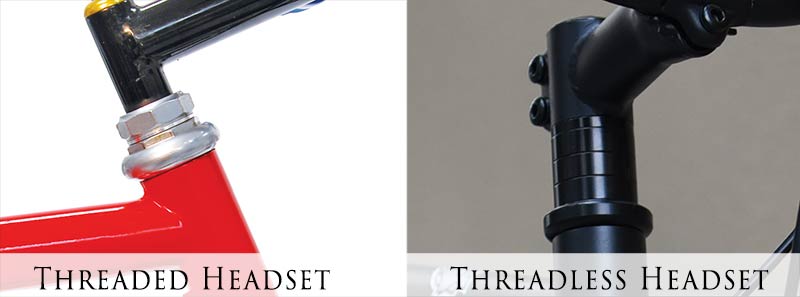
Threaded vs. Threadless Headsets
Bikes usually come with either threaded or threadless headsets. A threaded headset uses a threaded nut to keep the stem in place, whereas threadless headsets are kept in place with a special internal bolt that cannot be seen.
Threaded headsets are usually more compatible with front-mounted child bike seats. However, if your bike comes with a threadless headset, you can use a special adapter and still mount the bike seat.
You also need to think about the available space on your headset. Bike seats’ mounting brackets are usually between 0.5″ and 1.5″ thick. Therefore, that’s how much “room” you need vertically on your headset.
For example, the iBert seat, one of our top picks in this category, requires 3/4 of an inch on the headset in order to mount.
If you have a threaded headset, you can usually increase the available space by loosening the nut and raising the handlebar up.
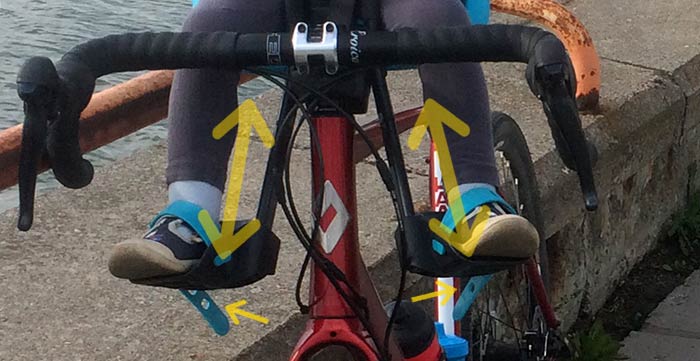
Is There Enough Available Space?
Most front-mounted child bike seats will take about 10″ of space between the stem and the saddle of your bike. Therefore, in order to mount it and ride without hitting your chest and knees into the saddle, you need at least 20″ of length in your top tube.
That’s one of the reasons why this type is not a good choice for road bikes. The rider usually leans forward, which means they are likely to hit the top of the seat with their chest.
— Front-Mounted (Saddle) —
When it comes to Front-Mounted Saddle type child bike seats, they attach to the bike in two main ways by:
- Clamping the stem and the seat post.
- Clamping the top and the down tube.

This type is most suitable for full-suspension bikes, carbon mountain bikes with sloping top tubes, and bikes with step-through frames. In order to determine whether or not your bike is suitable for this type of baby bike seat, you need to determine the width requirements for the mounting brackets.
For example, the Kids Ride Shotgun Seat fits top tubes between 35mm and 68mm wide and downtubes between 35mm and 100mm wide.
On the other hand, the Mac Ride child bike seat will mount to all threadless headsets with a special adapter that replaces one of the spacers on the headset. If your bike has a threaded headset, a special adapter can clamp to it with ease, but you need to purchase it separately.
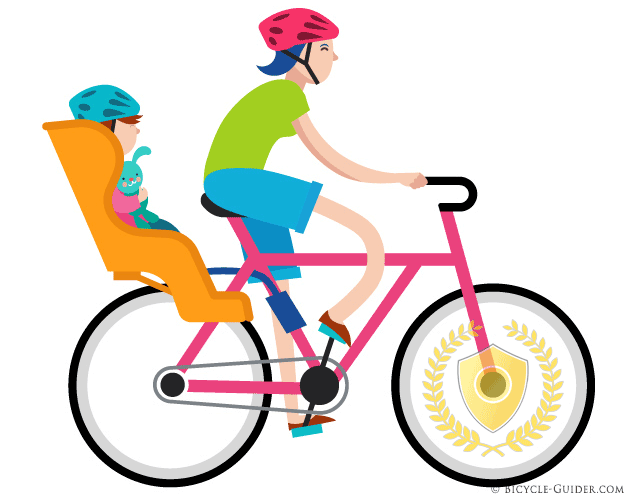
— Rear Frame-Mounted —
This is the most popular type of rear-mounted child bike seats nowadays. They are typically suitable for both small toddlers and older kids and come with premium comfort and safety features like reclining seats, suspension, and adjustable footrests and shoulder straps.
These seats mount by clamping the bike’s seat tube, therefore, your bike needs to meet three requirements in order to be compatible with it:
- There can’t be any cables on the seat tube.
- Your bike frame should not be made of carbon.
- Your saddle should not be in the lowest position (right above the frame).
Since most rear frame-mounted child seats attach directly to the frame (at the seat tube), you must make sure that there are no brake or derailleur cables on it. If you attach a seat adapter over the cables, your brakes or derailleurs will not work anymore.
Moreover, bikes with carbon frames are not suitable for these child seats. The mounting bracket might put too much stress on the carbon frame and break it.
Finally, your bike’s saddle should be at least 2″ above the frame in order to have enough room to attach a rear frame-mounted child bike seat. If it is not, you’ll need to buy a special adapter which is available with some child seats, such as the Thule RideAlong.
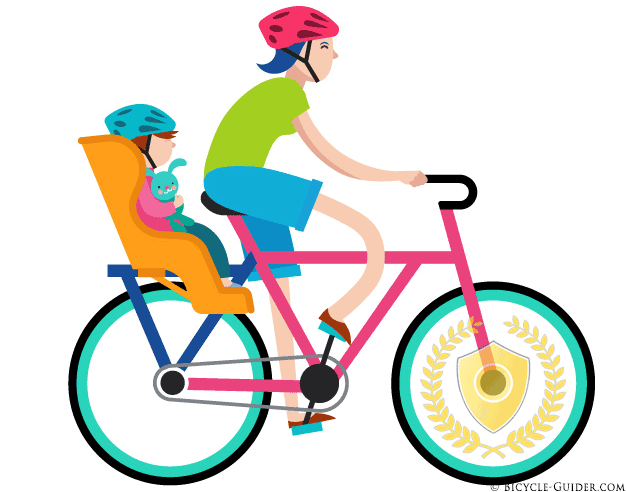
— Rear Rack-Mounted —
Rear Rack-Mounted child bike seats are identical to the Rear-Frame Mounted type in terms of design and available features. The only difference is that these attach to the bike’s rear rack (if there is one) instead of directly to the frame.
Therefore, before you purchase a rear rack-mounted child bike seat, you need to determine the following things:
- Does your bike have a rear rack? If yes, what is its maximum weight capacity?
- If your bike does not have a rear rack, does it have the eyelets to attach one?
So, if your bike has a rear rack, it will be pretty easy to spot it. It’s located just above the rear wheel and is attached to the frame. The next thing to make sure of is that its maximum weight capacity is around 60 lbs, so that it can carry both the weight of the child bike seat and the child that’s riding in it.
For example, the Thule Yepp Maxi rack-mounted baby bike seat weighs 10 lbs and has a weight capacity of 48.5 lbs, which is 58.5 lbs combined. That’s how much your bike rack needs to be able to carry, assuming you’ll be using all of the child seat’s weight capacity.
On the other hand, if your bicycle does not have a bike rack, you should check whether or not it has rear bike rack eyelets. They are located near the top of the rear triangle and near the bike’s rear axle. The ones on the top are pretty easy to spot and they guarantee that the bottom ones are present as well.
Step #3: Determining Important Specs and Features
Child’s Age and Weight
When choosing what type of child bike seat to get, you should consider your child’s age and weight. Front-mounted and rear-mounted baby seats differ greatly in this regard.
- Front-mounted child bike seats are generally much smaller than rear-mounted ones. Most models are recommended for children between 9 months and 5 years old, up to 33 pounds in weight.
But there are some exceptions, of course. These seats are not good for taller and older kids because they will take up a lot of space in front of the rider and make riding difficult.
Make sure to also check your local laws, as in some countries around the world, children less than one-year olds are not allowed to ride on a bike. - Rear-mounted child bike seats are much larger, which makes them suitable for older and heavier kids. They are usually intended for children between 9 months and 6-7 years old. Their average maximum weight capacity is around 48 lbs. Note that it is not recommended to put a helmet on children below the age of 12 months, which means you should reconsider taking them on rides if they are younger than that!
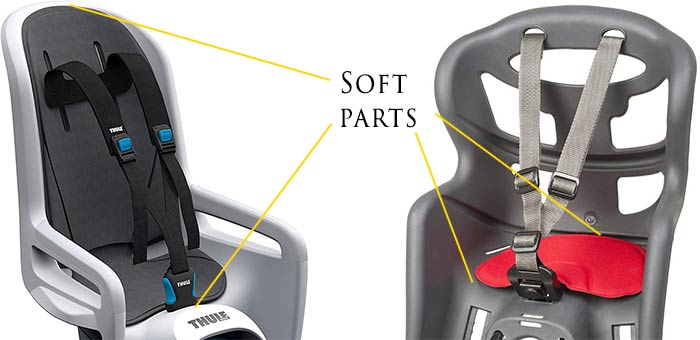
Shoulder Straps Design
Shoulder straps are an important safety feature to consider when purchasing a child bike seat. The good news is that all child bike seats (except for front-mounted saddles) have safety straps. However, they are not all made equal.
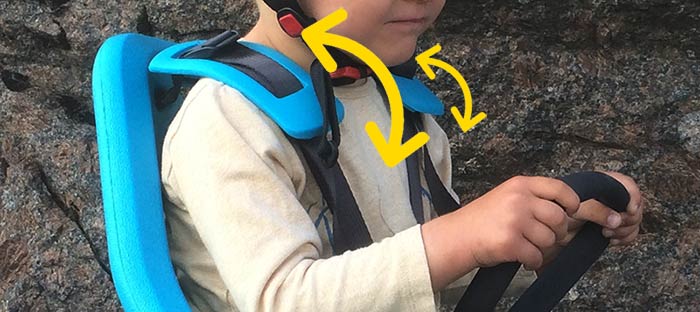
Shoulder straps differ in design and the ease of adjustability. Some shoulder straps can be tightened by simply pulling on their ends (like the straps of a backpack), whereas others have two or three slots in the seat’s backrest for height adjustments.
Some strap systems, such as the one on Bellelli Pepe, also allow you to adjust the depth of the straps on the seating part. This allows for easier adjustment between smaller and larger kids.
Finally, shoulder straps also differ in the amount of padding they have. The ones without any padding can sometimes slide off kids’ shoulders and are generally much less comfortable on longer rides.
Reclinable Seat
If you want to be able to recline the bike seat and allow your kid to take a nap on longer rides, you should be considering rear-mounted seats. Both frame- and rack-mounted ones have this feature, but it’s usually seen on higher-priced models.
Some notable examples include Thule RideAlong and Hamax Caress.
Front-mounted seats do not have reclining seats, as that would take too much space from the parent riding the bike.
Seat Shape and Padding
The seat shape and the amount and quality of the padding will greatly influence your little passenger’s comfort, especially on longer rides.
Some child bike seats have low backrests and low sidewalls, whereas others have higher. A tall backrest and tall sides mean that your kid will be better supported from each side and will be able to fall asleep on longer rides. The straps on such seats also fit much better and slide off more rarely.
Helmet pockets are another important feature when talking about seat design. These are special recesses at the top of the backrests that provide additional space for the helmet and prevent the child’s head from slanting forward while riding.
Most front and rear-mounted seats also have soft padding that can be removed to be washed or replaced when worn out. However, there are some child seats, such as the Thule Yepp Maxi, which have no padding and are thus more suitable for warm climates because of better ventilation.
Safety Features
Safety is the number one concern parents have when it comes to using a child bike seat. That’s why features such as reflectors, rear lights, and bumpers are very desirable.
Many rear-mounted seats have built-in reflectors that improve visibility at night. Some premium models also have mounting points for rear lights that you can buy separately and attach to improve visibility even more.
Bumpers are special projections on the side of the seat that protect children’s hands and fingers from being squished when the bike is leaned against a wall.
Suspension
Suspension is a very important feature of child bike seats that not many models offer. Front-mounted seats don’t come with suspension, but some rear-mounted do.
When it comes to rear frame-mounted seats, the metal bars that connect the seat to the frame are designed to flex under tension, so they act as suspension. They eliminate vibrations and impact when going over potholes, curbs, or other bumps.
Some rear rack-mounted seats have dual-spring suspension that flexes 1″ to 1.5″ and does a good job at making the ride smoother and less jittery. It’s definitely always a plus.
Adjustable Footrest
All front-mounted (except for some saddle-seats) and rear-mounted seats come with footrests. However, not all of them are adjustable. Footrests have a threefold role on child seats — they make the ride more comfortable for the child, provide support for the legs, and protect the feet from the wheels.
Adjustable footrests are an important and desirable feature that allows the seat to grow along with the child. The height-adjustment is done tool-free and in a matter of seconds.
The addition of foot straps on the footrests is another big plus because it significantly improves the safety of the child.
Availability of Accessories
When choosing which baby bike seat to purchase, you should also consider the availability of accessories. These are designed to make the ride safer or more comfortable for you and your little passengers.
Usually, accessories are only available for front-mounted seats and include an additional handlebar and windshield. The kid’s handlebar is a good idea because the child will feel more comfortable having somewhere to hold with their hands. They will also not grab your hands or your handlebar too much.
The windshield, even if not essential, will make the ride more pleasurable and shield the child from the wind when riding.
Step #4: Choosing the Right One
 Now that you have all the necessary knowledge, you should feel confident enough to choose the perfect child bike seat that suits your bike, your child, and your personal needs.
To recapitulate, you should pay attention to the following factors:
- Is your bike suitable for a child bike seat?
- What kind of child bike seat can you fit?
- Is front or rear-mounted better for your needs?
- What features would make your daily rides more comfortable?
For some quick recommendations, you can take a look at our choice of the 11 best child bike seats out there, on the following page:
We’ve included several premium and budget versions in all four categories: 1) Front-mounted handlebar, 2) Front-mounted saddle, 3) Rear frame-mounted, and 4) Rear rack-mounted.
Step #5: Installation
 Your seat has arrived?
Nice! Now let’s attach it and go for our first ride!
Always follow the manufacturer’s instructions! This paragraph is for informational use only, to inform you of the overall installation process!
Attaching a Front Bike Seat
- Threaded Headset
If your bike has a threaded headset, usually all you have to do is attach the seat’s mounting bracket to the stem and then attach the saddle to it. The mounting bracket is usually a simple clamp that opens, grabs the stem, and then tightens with Allen keys.
- Threadless Headset
If your bike comes with a threadless headset, the process requires a few more steps, but it’s still pretty straightforward. All you have to do is follow these steps:
- Unscrew the stem and the headset cap bolt.
- Take the stem off.
- Take one of the headset spacers off and replace it with the seat’s mounting bracket.
- Put the stem and the headset cap bolt back on and tighten them firmly.
Note that not all child seats come with a mounting bracket suitable for threadless headsets. You’ll have to make sure that yours does or buy it separately if possible.
Attaching a Front Bike Saddle to the Frame
A front bike saddle that attaches to the frame is one of the easiest to mount. All that you have to do is place the saddle over the top bar in your desired position and tighten the screws on the sides. The tightening is usually done with a quick-release bolt, so you can easily take the seat off or change its position. If you have a carbon frame, make sure not to tighten the bolts too much so as not to damage the stiff carbon.
Attaching a Rear Bike Seat
A rear bike seat that attaches to the frame is very similar to a front-mounted handlebar seat. It comes with a special mounting bracket that attaches to the frame, to your bike’s seat tube (the tube between the pedals and the saddle).
Before you clamp the mounting bracket to the seat tube, make sure that there are no cables running along it. If there are, your bike is not suitable for this type of saddle.
Once you install the bracket, all that’s left to do is attach the saddle to it and tighten all bolts securely.
Attaching a Rear Bike Seat to the Rack
To attach a rear bike seat to the rack, you first need a rack that has a sufficient maximum weight capacity — 60 lbs is ideal.
After that, you should place the seat over the rack and then tighten the special clamps that most bike seats of this type come with. These can usually be tightened by hand, but some require Allen keys.
To secure the seat to the rack even better, there’s often a pair of heavy-duty straps as well. One pair wraps around the rack under the seat, whereas the other pair wraps around the bike’s seat tube or seat post.
Once you’ve made sure that everything is sufficiently tight and the seat cannot shake or move, you’re ready for your first ride!
Caution first
A few things to keep in mind to stay safe when using child bike seats:
- HELMET! For you and your kid — always! From the moment you are lifting them to put them in the seat.
- Always do the test ride alone.
- Always fasten the feet last and unfasten them first — otherwise, if your child falls, they might hurt their legs and even break bones.
- Check each and every bolt and attachment point after the first 100 feet, the first 1,000 feet, and then before and after every ride!
- Tighten all safety straps.
- Keep any tools necessary for adjustments in your pocket.
- Keep in mind that the bike’s balance will change due to the change in weight distribution. You can’t turn as sharp as before in corners.
FAQ
How to install a child bike seat?
To install a child bike seat, you need to follow the instructions provided by the manufacturer. Each seat uses a different approach, so you can check our Step #5 – Installation if you want to get a good idea of which steps to take for each type of child seat.
Are baby bike seats safe?
Baby seats are safe when you pay close attention to two important factors: 1) Your riding behavior and 2) Proper attachment.
At what age can a child ride in a bike seat?
The law says 9 months, but we would say starting from 9 months or not before a baby can sit properly on their own.
Can a 6-month-old ride in a bike seat?
The answer is no. It is not safe to take a 6-month-old baby on a ride in a bike seat and the law prohibits it in most places.
Is a front or rear child bike seat safer?
My opinion is that front-mounted seats are safer because you can see the child at all times, but you should do your own research and conclude what works best for you.
Do all child bike seats fit all bikes?
No, not all child bike seats fit all bikes. To find out what type of bike seat you can fit on your bike, please take a look at Step #2: Assessing Bike Requirements of this article.
How do I take my child bike seat off?
To take your child bike seat off, you generally have to either unclip the seat from the bracket mounted on the bike or unscrew any mounting points that secure the bike seat.
Do you know which seat would work best for a mountain bike?
We just got the Marin bolinas ridge 1 and I can’t find anything online specifically for putting a seat on a mtn bike. It’s for a 1 year old, so things like the Mac ride won’t work.
Thanks!
Hi Kelsey,
Can you check out this link? It’s for Mountain bikes so this might help you.