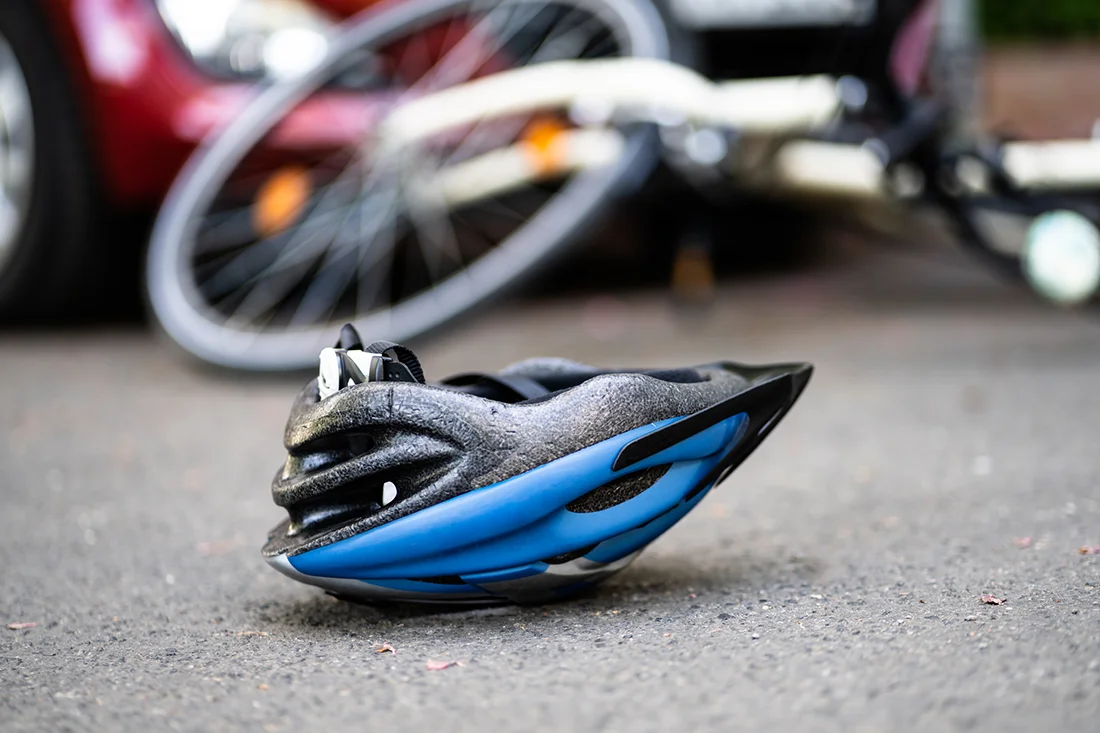
Choosing the right brakes for your bike is a complex task that will influence your safety and determine your riding experience. Our guide explains everything you need to know about the different types of bike brakes out there.
Surprisingly, they are also often overlooked and not given enough thought. We get it, navigating through a sea of options is a daunting task, which is why we’ve created this guide — to simplify your choices.
We’ll tell you the basics of bike brakes, give you a rundown of different types (disc, rim, coaster, etc.), and compare some of the most popular options to help you make an informed decision.
Bike brakes are easily one of the most important parts of a bicycle. If they work well, they will improve your confidence, increase your safety, and might even save your life.
Let’s start with the basics.
Contents
Bike Brake Basics Explained
Bike brakes provide stopping power and control, both of which are incredibly important. Bicycle brakes allow you to control your speed, corner properly, descend safely and stop on a dime in case of any obstacle or emergency.
Most bicycle brakes work in a similar way and consist of similar bicycle brake parts. In terms of working principles, the two main bicycle brake types are mechanical and hydraulic brakes.
With the countless different types of brakes for a bike, it seems like a headache to figure out which one would fit your needs the best.
Mechanical brakes use a steel cable that connects the lever to the brake caliper, activates the caliper, and applies brake pads to the braking surface. Hydraulic disc brakes have a sealed hose with hydraulic fluid that compresses once the lever is pulled and activates the brake caliper.
The amount of stopping power and braking precision you get from a particular model of bicycle brakes depends on a lot of things. The most important ones include the quality of the components, the weather, the weight of the bicycle and the rider, tire grip, road surface, terrain, and so on.
Types of Bike Brakes
Even though rim and disc brakes are the two most common types of bike brakes, there are a few other less common types that you should also take into consideration.
All of these brake systems differ in terms of the braking power they provide, the way they attach to the bike, their intended use, and price, among other things.
Let’s dig deeper into the details of each type and learn about a few common subtypes as well.
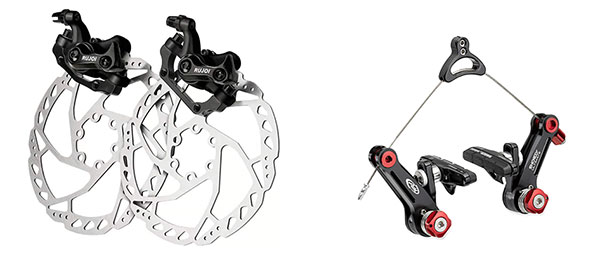
Rim Brakes
As the name suggests, rim brakes use the rim of the wheel as the braking surface. The caliper attaches to the frame or the fork and brake pads squeeze the rim when you press the brake levers.
Rim brakes are most often seen on road bikes, cheap mountain bikes, and some hybrid and city bikes. However, more and more road bikes come with bicycle disc brakes nowadays as well.
The two most common subtypes of rim brakes are caliper and cantilever brakes.
Caliper brakes
Caliper brakes are most commonly found on road bikes, especially on high-end lightweight models and inexpensive models.
They attach to the frame or the fork of the bike via a single bolt and are typically activated with a cable. There are a few hydraulic models out there, but these are very rare. In addition to the single-bolt variety, direct-mount caliper brakes that use two bolts are rising in popularity as well.
Caliper brakes can also be divided into single-pivot and dual-pivot, which refers to how the calipers pivot when activated. Dual-pivot models are more powerful and are the most common type on modern road bikes.
Cantilever and V-Brakes
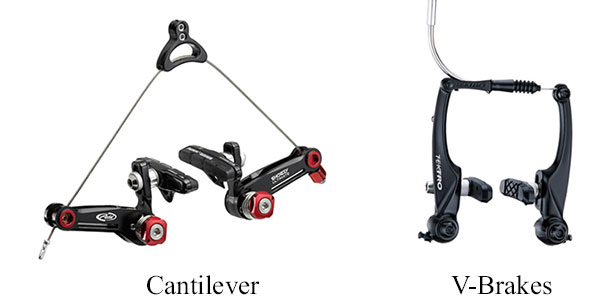
Cantilever brakes used to be common on cyclocross bikes, but they are slowly being replaced by bicycle disc brakes due to their superior performance in wet and muddy conditions.
The center-pull cantilever brakes have two brake arms attached on either side of the wheel, with a centrally lined cable pulled upwards when the brake lever is pressed.
They used to be common on cyclocross bikes because of having more clearance between the wheel and the mechanism compared to caliper brakes which translates to superior mud-shedding properties.
V-Brakes are another very common subtype of cantilever brakes found on affordable hybrids, city bikes, MTBs, and touring bikes. V-brakes also have two brake arms attached to either side of the rim, but the cable is mounted to the side, which means they are direct-pull, rather than center-pull. That means that one arm is pulled toward the rim, whereas the other arm is pushed toward the rim. On the center-pull variety, both arms are pulled toward the rim.
V-brakes are simple, cheap, and give you decent stopping power for everyday riding around the city. However, they are not a riders’ favorite on performance bikes due to subpar braking and modularity compared to other bicycle brake types.
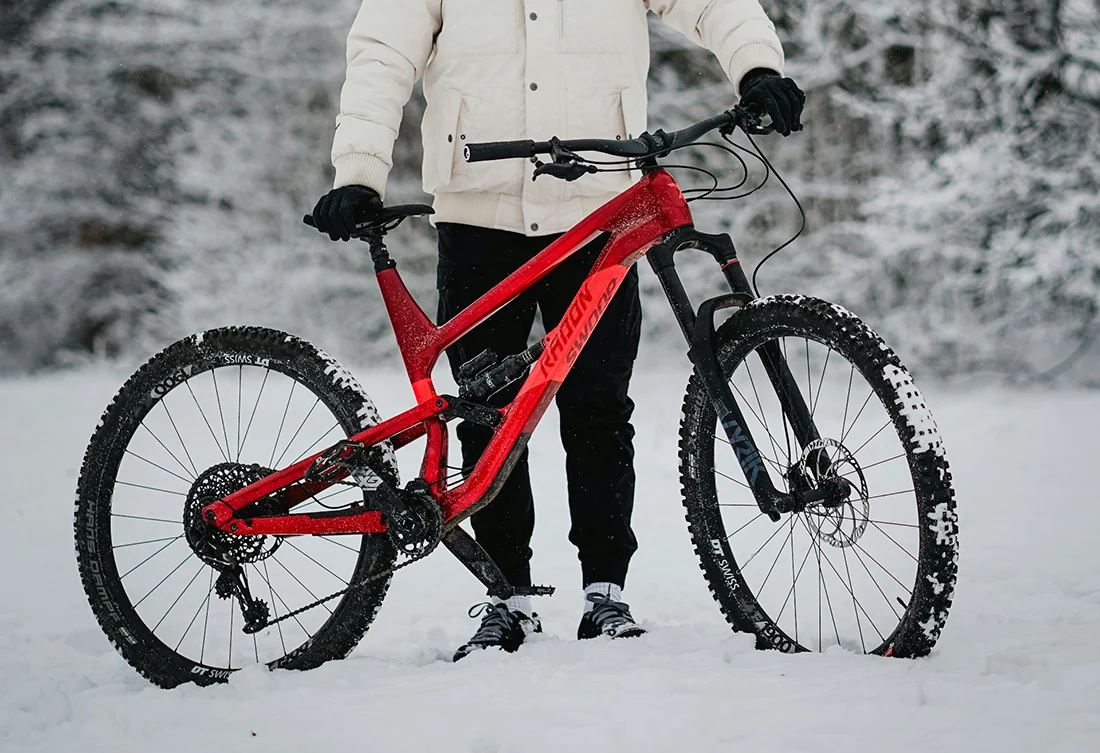
Disc Brakes
Moving forward with the types of bike brakes, disc brakes are the new norm nowadays.
A few years back, bicycle disc brakes used to be found only on performance-oriented mountain bikes. However, they have now become the golden standard found on almost all types of bicycles, including road bikes.
While disc brakes are not ideal, they offer better braking performance and more modularity compared to all other types, in most riding conditions. Their superiority is most obvious in wet weather, but their weight is keeping the weight weenies away.
Disc brakes are divided into mechanical and hydraulic subtypes, though both have similar bicycle brake parts and work in a similar way.
A bicycle brake caliper attached to the frame or the fork squeezes a steel disc (aka “rotor”) bolted to the wheel and positioned between the brake pads inside the caliper.

Depending on whether the mechanism pushes only one or both brake pads toward the rotor, we can also differentiate between single-piston and dual-piston brakes. Some mountain bikes even come with four-piston disc brakes that offer more stopping power and better cooling properties.
Mechanic Disc Brakes
Mechanical disc brakes are also known as “cable-actuated” bicycle disc brakes. They use a steel cable to activate the caliper and apply braking force.
These brakes get a lot of bad rep because they’re heavy and require the rider to squeeze the levers harder to get decent stopping power. However, they are cheaper than the hydraulic type which is why they are often seen on affordable bicycles.
Mechanical disc brakes are also more complicated to adjust, cause more rotor rub issues, and some cheap models even have worse braking performance than a decent pair of rim brakes.
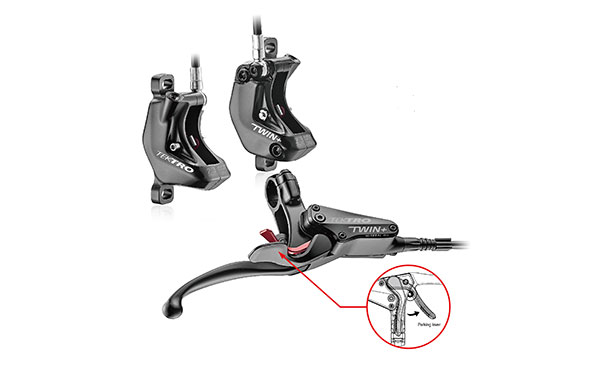
Hydraulic Disc Brakes
Instead of a cable, hydraulic disc brakes use a fully sealed hose filled with hydraulic brake fluid. When you press the brake lever, the fluid inside the brake system compresses and activates the bicycle brake caliper that pushes brake pads toward the rotor.
Hydraulic disc brakes are better than mechanical disc brakes in almost all regards. They have better-stopping power and better modularity. They are also a lot easier to adjust but come at a higher price point.
The only disadvantage to disc brakes is that the brake system needs to be bled occasionally to remove air bubbles. This can get messy and requires special tools, so most riders will need to take their bikes to a LBS periodically, as part of regular maintenance.
Coaster Brakes

Coaster brakes are found on single-speed bikes, such as city bikes and cruisers. They are the simplest to use and require zero maintenance.
All parts of a coaster brake are sealed inside the rear hub. They are activated by pressing the pedals backward which pushes a brake shoe against the rotating mechanism inside the rear hub. That way, the hub cannot rotate and the bike slows down and comes to a stop.
Even though coaster brakes are cheap and easy to use, they don’t provide good modularity and can easily lock the rear wheel. As a result, the tire will skid which will reduce braking performance and increase braking distance.
U-Brakes
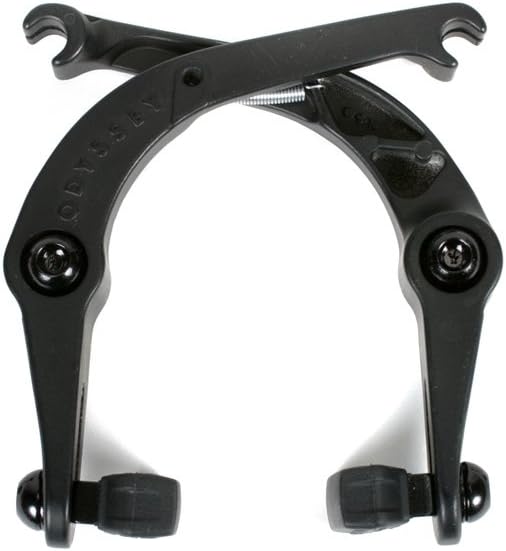
An u-brake is a rim brake variation that’s commonly seen on BMX bikes and old-school mountain bikes. In terms of how they work, we can say they are a mix between caliper and cantilever brakes.
They consist of two L-shaped brake arms mounted on each side of the wheel above the rim that cross above the tire. The arms are pulled together either by a cable lined from the side or a straddle wire carrier pulled by a brake cable.
Disc Brakes vs. Rim Brakes: How to Choose
What are the biggest differences between rim brakes and disc brakes? This is a common question asked by riders who can’t decide between the two.
Our rundown of the biggest distinctions below will help you make a choice that suits your specific needs.
Braking Power
Bicycle disc brakes create a lot more braking power than rim brakes. The reason is that the brake pads on disc brakes have a larger surface and squeeze the rotor with more force. They can easily stop a bike on a dime, even in wet weather.
Moreover, because of having more stopping power, you need less hand strength to activate the bicycle brake calipers and slow down or come to a halt.
Modulation (Control)
Disc brakes and rim brakes also differ in terms of modulation. This term refers to how well you can control the amount of braking power that you want to apply to the calipers.
With disc brakes, it’s much easier to apply the brakes lightly, hard, or somewhere in between. As a result, you will have better control of your speed when cornering or descending, which is especially important when descending and cornering.
Weight
Disc brakes are more powerful but they weigh a couple of hundred grams more than rim brakes, on average. This might not be a big problem for recreational riders, but it is for climbers and performance-oriented cyclists.
Still, that doesn’t prevent almost all professional cyclists in Grand Tour pelotons to use disc brakes, despite the weight penalty.
If you think a 200-300g difference will make or break your ride, then go with rim brakes.
Price
Rim brakes are by far the less expensive bicycle brake types. Disc brakes are more complex, which is especially true for hydraulic disc brakes, which come at a higher price.
That’s the only reason why many affordable road and hybrid bikes still feature rim brakes instead of discs. If you have a very limited budget, higher-end rim brakes will provide more braking power than cheap disc brakes.
All-Weather Reliability
Last but not least, another big difference between these two types of bike brakes has to do with all-weather reliability. Namely, disc brakes are a lot more reliable in wet weather, snow, and muddy conditions than rim brakes.
If you frequently ride in wet conditions or ride off-road on muddy trails, a good pair of hydraulic disc brakes will make a world of difference.
How to Adjust Bike Brakes
Adjusting bike brakes properly is just as important as choosing a high-quality model that suits your needs. Depending on the type of bike brakes you have, the adjustment process can be more or less complicated.
Here’s how to adjust some of the most common types.
Related: Bicycle Chain Cleaning and Maintenance
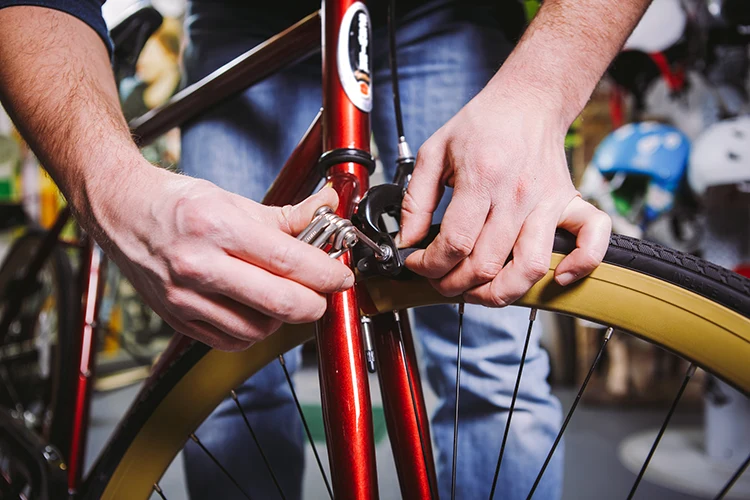
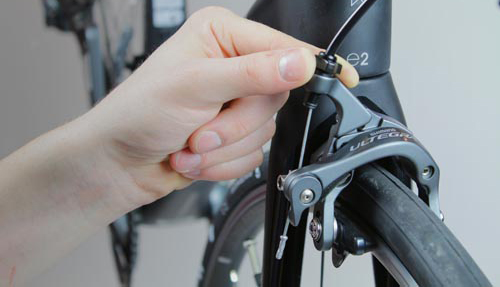
Adjusting Cable-Actuated Rim Brakes
Most cable-actuated rim brakes can be adjusted in two places: at the caliper or by using the barrel adjuster.
The barrel adjuster is located at the point where the cable enters the brake lever and allows you to add or remove tension to the cable by tightening or loosening the barrel. This is great for minor adjustments.
More significant adjustments are made at the caliper by loosening the bolt that holds the cable in place and pulling the cable to add more tension to the system.
Ideally, you’ll want the brake pads to be a couple of millimeters away from the rim, without rubbing against it while you ride. If your pads are too worn, you should first replace them before attempting to readjust the brakes.
Adjusting Mechanical Disc Brakes
Adjusting mechanical disc brakes is slightly more complicated compared to rim brakes. The process also differs depending on whether you have single-piston or dual-piston disc brakes.
The first thing you need to do is get your bike on a repair rack or swing it upside down.
If you have single-piston brakes, you should first loosen the bolts that hold the brake caliper and align the caliper so that the moving (outside) pad is as close to the rotor as possible (1-2mm). Tighten the bolts after that. Next, you should turn the screw on the opposite side of the caliper (pad adjuster) to move the stationary pad as close to the rotor as possible, but not too close so that it causes rubbing. Further adjustments can be made by using the barrel adjuster or the cable, just as with cable-actuated rim brakes above.
On dual-pivot brakes, you should first turn the inner and outer pad adjusters all the way out. Then, loosen the bolts that hold the caliper to the frame, press the brake lever firmly, and retighten the bolts. This will center the caliper over the rotor. Finally, use the inner and outer pad adjusters to bring both pads as close as possible to the rotor so you have ample braking power without any rubbing.
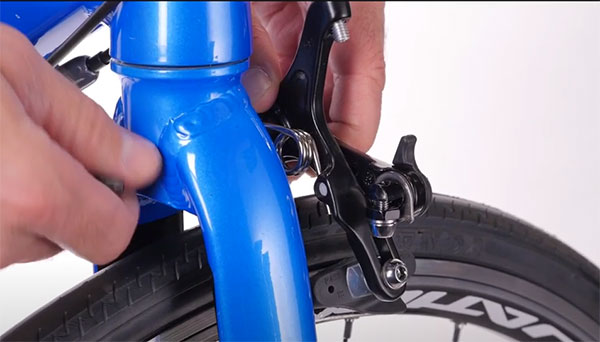
How to Align Hydraulic Disc Brakes
Hydraulic disc brakes are the easiest to adjust. In fact, they are self-adjusting and all you need to do is center the caliper over the rotor properly.
To achieve this, all you need to do is loosen the bolts that attach the caliper to the frame/fork. Next, press the brake lever and hold it as you tighten the bolts back. Your pads should now be aligned and your brakes should be performing well.
If you feel that the levers are sinking and you have limited stopping power, you should probably replace the oil in the system (bleed the brakes) or replace the pads.
Best Bike Brakes Brands
Bicycle brakes are made by a large number of brands which gives you a lot of options on the market. Some companies specialize in making brakes for a specific bicycle type, such as mountain or road. Other bike brake manufacturers have a more diverse offering.
The most common and the best brands you’ll see on bikes and in shops include:
- Shimano
- SRAM
- Tektro
But also
- TRP
- Magura
- Formula
- Clarks
- Hayes
- Hope
When it comes to mountain bikes, SRAM is considered to be the best choice, especially its Guide RE brakes. However, Hope, Hayes, and Magura are strong contenders as well. Shimano shouldn’t be written off either with its excellent XTR hydraulic discs.
Shimano is also the most common brand you’ll see on road bikes. Its 105, Ultegra, and Dura-Ace calipers are often found on mid-range and high-end road bikes. Tektro and TRP models are commonly seen on affordable road bikes.
This information is a good starting point when deciding which bike brakes to get. However, to make the best choice, you should compare different models and consider your personal needs as well.
If you’re interested in more of the technical parts of the bike, see our guide to bike groupsets.
FAQ
What are the different types of bicycle brakes?
The most common types of bike brakes you’ll come across on commercial bikes include disc brakes and rim brakes. However, there are also coaster brakes, u-brakes, and drum brakes. Disc brakes include mechanical and hydraulic bicycle brake types, whereas rim brakes are divided into cantilever and caliper brakes.
How do I choose bike brakes?
To choose the best bike brakes for your bike, you first need to determine what your needs are. For example, if you ride in wet weather and descend a lot—get hydraulic disc brakes. If you ride in dry weather and you want to save some weight—rim brakes will be a better choice.
What kind of bike brakes are best?
The best brakes for a particular rider depend on the needs of that rider. Hydraulic disc brakes offer the most braking power and the best brake modulation, but they are also the heaviest. On the other hand, rim brakes are lightweight, but they don’t break as well in wet weather.
How much are brakes for a bicycle?
The price of bike brakes depends on the type of brake, the manufacturer, and the level of performance. Very cheap V-brakes cost as little as $20, whereas high-end hydraulic disc brakes cost hundreds of dollars. If you have to change brake levers as well, the price can become even higher.
How do you fix bike brakes?
In order to fix bike brakes, you first need to determine what the problem is. Different bike brakes are adjusted differently and may have different problems. Therefore, if you don’t know what you’re doing, it’s best to take your bike to a local bike shop and let certified mechanics take care of your issue.
What are the disadvantages of disc brakes?
The main disadvantages of disc brakes are weight and heat dissipation. Namely, a lot more bicycle brake parts go into making a disc brake compared to rim brakes, so they can get hefty. Disc rotors also have a much smaller surface area than the rim braking wheel, so they can get hot and lose braking performance.
Are V-brakes better than caliper?
Generally, V-brakes are usually found on inexpensive bikes, whereas calipers are found on pricier road bikes. High-end caliper brakes offer excellent stopping power, whereas V-brakes are somewhat lacking. However, these two bicycle brake types are attached differently on the bike, so they are not interchangeable.
Do all brake pads fit all bikes?
No, not all brake pads fit all bikes. Disc brakes and rim brakes use different types of pads. Brake pads also differ from one disc brake model to another. Moreover, cantilever and caliper brakes also use different types of brake pads. So, when buying, make sure you know exactly what brake pads you need.
Should I use front or rear brakes on a bike?
To get the best braking performance and the most stopping power, you should use BOTH brakes at the same time. Depending on the circumstances, you’ll be pressing one less than the other, but you should still be using both. Some riders are afraid of using the front brake which is a huge mistake.
How long do V-brakes last?
V-brakes can last months or years, it all depends on how you take care of them and how much you use them. The mechanism itself should last for years, whereas the brake pads should be changed when worn. The cables should be changed occasionally as well, typically once every few years.
I have a unique rear brake assembly on 2 older used bikes I bought, that aren’t listed in the types shown. It’s a mechanical, with a ribbed disc (ribs on inner side), with a single part that compresses against the disc. Presently, on both bikes, they are not working. My bike mechanic has never seen this type, saying he doesn’t know how to repair them.