Our bicycle wheel-building guide will teach you everything you need to know about bike wheel building. All you need is a compatible hub, rim, and spokes to get started. A few tools will help out, but the entire process is easier than you think.
Homemade bicycle wheels can be even better than store-bought wheels. When you make a wheel at home, you can curate the spoke tension to be exactly as you like. The entire process is fulfilling, too, and may even be cheaper than buying a wheelset from your local shop. This post is a complete bicycle wheel building guide for beginners.
Key Elements of a Wheel Build
Before we get into the nitty gritty of bicycle wheel building, we need to know the elements of a bicycle wheel. There are a few key parts to the wheel that are consistent across all types of bikes from road bikes to MTB.
Hubs
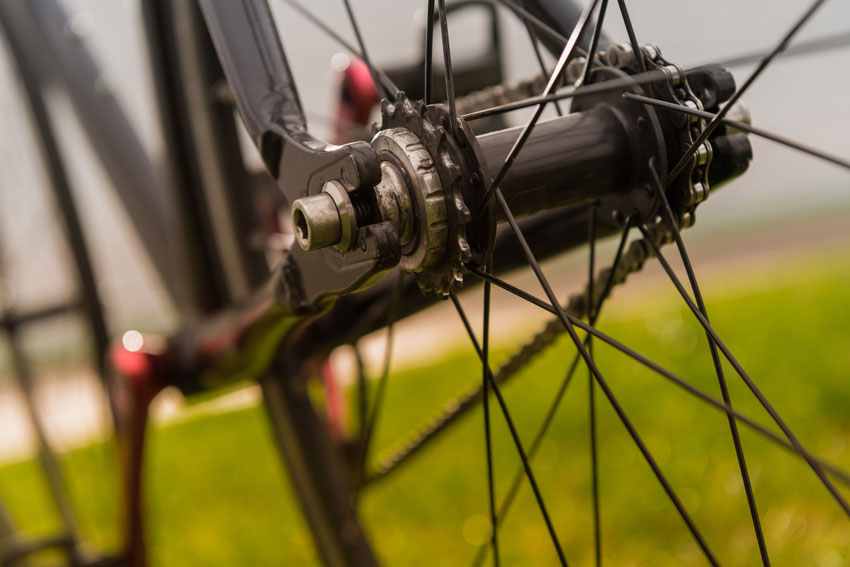
Hubs are the centerpiece of the wheel. Spokes connect the hub to the rim, creating a solid structure for the wheel. The inner structure of hubs is quite fascinating.

Part of the hub spins with the wheel while the other part stays level with the rest of the bike. The hub shell includes flanges holding the spoke ends, which spin in line with the wheel.
Hubs attach to the dropouts of a bicycle, connecting each wheel to the frame. The front hub typically attaches to the bike’s fork, while the rear hub attaches to the bike’s rear dropouts.
The rear hub also contains a freewheel on most bikes, allowing you to coast/freewheel. This is also where the rear cassette attaches to the hub.
Rims
A bicycle rim is the circular part of a bicycle wheel that gives it its circumference. The rim holds the tire in place, typically with a hook or groove. Though hookless rims are becoming increasingly popular, especially with tubeless bike tires.
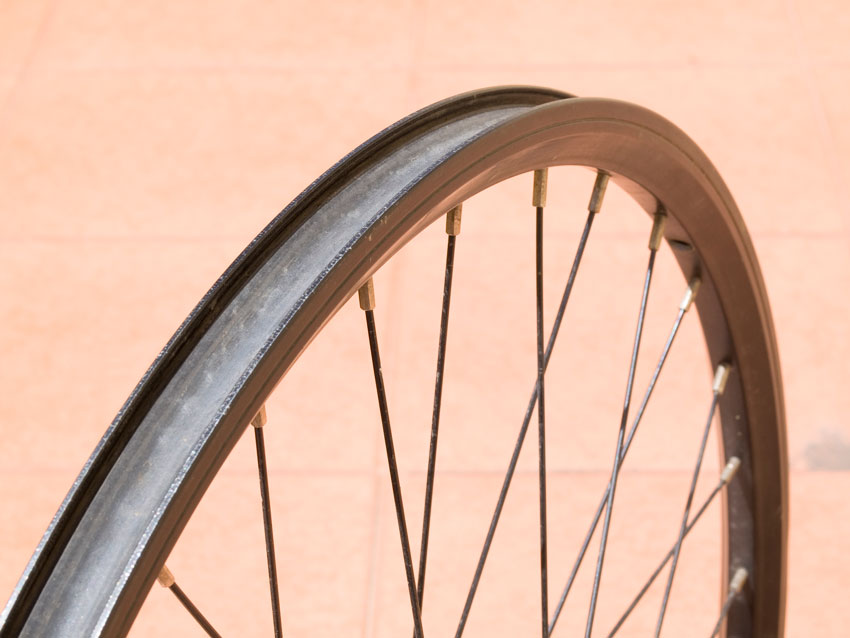
The tube sits inside the groove of the rim while the tire is held in place around the tube and rim. Rims are typically made from aluminum or carbon. The former is cheaper and more common, while the latter is reserved for higher-end racing bikes.
On bikes with rim brakes, there is often a track on the outside of the rim that is meant for the brake pads as they slow the wheel down. Spokes attach to the inside of the rim, connecting it to the hub in the center of the wheel.
Spokes
The spokes are the array of thin rods that attach the rim to the hub. Spokes give the wheel structure. Without spokes, the wheel would collapse. Most road bicycle wheels have 18-28 spokes and a few more spokes in the rear wheel compared to the front wheel.
You may hear the term “butted spoke,” which means that the spoke is slightly narrower in its middle compared to its ends. Most spokes are made of aluminum or steel, and higher-end wheels have spokes made of carbon fiber.
Spokes connect to the rim through spoke nipples. They attach to the rim in different ways, sometimes straight-on (straight-pull), hub-end flange, or J-bend.
Tubing
Bicycle tubes are circular pieces of material that fit in between the tire and rim. Tubes hold pressurized air that gives the tire its shape and protects the rim from bumps and potholes.
Tubing is often made of rubber, and they are also called inner tubes. Inner tubes are most common in clincher tires. In tubular tires, the tire and tube are one piece that is glued to the rim. And in tubeless tires – as you probably guessed – there is no inner tube.
When cyclists “get a flat tire,” it is most common that they have punctured the inner tube rather than cutting the tire itself. You can change a bicycle tube on the side of the road in just a few minutes. However, it is much more difficult to change tubular tires and tubeless tires that are glued or secured to the rim.
Tires
Without an inflated tire around each rim, it would be nearly impossible to ride your bike. Tires go around each rim to provide a soft and grippy cushion between our bike and the road.
Tires give us grip on tarmac and dirt, protect our rims from potholes, and give us both straight line and cornering speed. They also make bike-riding way more comfortable. Modern-day tires are simultaneously robust, fast, and comfortable.
There are a few different types of bike tires, including clinchers, tubulars, and tubeless tires. Each of these tires attaches to the wheel’s rim in a different way.
Mountain bike (MTB) tires are significantly wider than road bike tires, so they need a wider rim. When building a bicycle wheel, make sure you have compatible rims and tires.
Brakes
With self-made bicycle wheels, the most common (and simple) design is for rim brake bikes. However, it is possible to make self-made bicycle wheels with disc brakes.
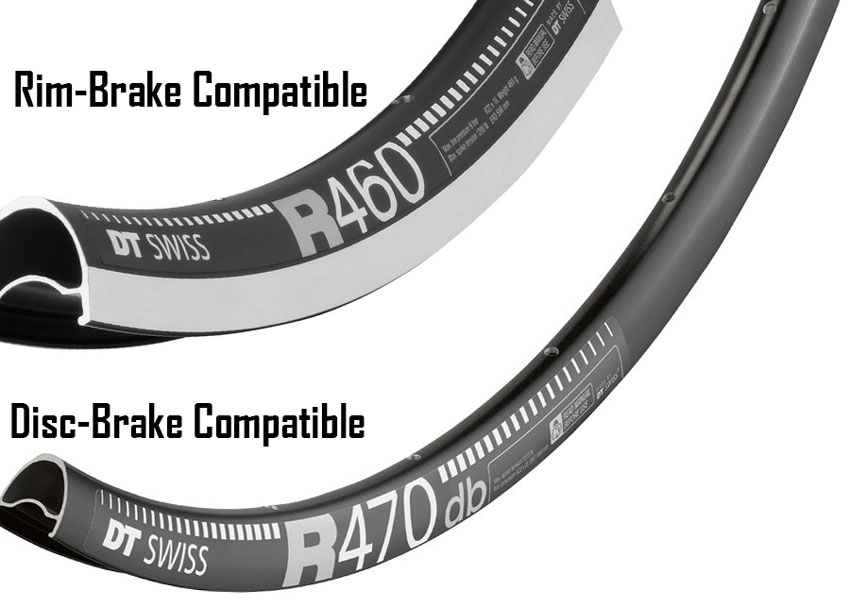
Rim brakes attach to the bike’s frame, not to the wheel itself. So when you’re making your own wheels, you only have to worry about the rim brake track, if at all. But with disc brakes that attach to the wheel’s hub, the process is a bit more complicated.
Read more: Types of Bike Brakes Explained
First, you need to make sure that your bike frame is disc-brake compatible. Check if it has a place to attack disc brake calipers to the front fork and the rear triangle.
Next, you need to get a hub that will allow you to attack a disc brake rotor to it and get disc brakes that are suitable for the types of mounts your bike frame has.
Therefore, the process is slightly more complex compared to building a wheel for rim brakes, but anyone can do it. Read our guide on disc brakes to learn more.
How to Build a Bicycle Wheel
Here it is, the art of building a bicycle wheel. First, these are the steps you need to take to have everything prepared.
Have a compatible set of rims, hubs, and spokes. If each part doesn’t match up with the others, you’ll get stuck at some point in the process.
Wheel building begins with having the proper parts and tools and ends with a fully functioning wheel. The purpose of building wheels is to attach the rim to the hub using compatible spokes. From there, you need to bring the entire wheel to the proper tension so that it is neither too tight nor too floppy.
To begin the process, lay out your rim, hub, and spokes on your workstation. Designate your spokes into the non-drive side and drive side spokes. This is an important step in ensuring your spokes will be laced properly.
It is best to prep the spokes by dipping them in oil, cleaning off the excess, and then putting them aside. Place the spoke nipples in your workspace as well, this is how the spokes attach to the rim.
When building a bicycle wheel, we recommend placing a piece of tape over the valve hole at the beginning of the build. This serves as a good reference point throughout the process so that you don’t get lost in the circular process.
Now it’s time to start building the bicycle wheel.
Placement of the spokes
Grab the hub and have the drive side facing you. If you’re working on the front wheel, look for a label that designates the wheel’s direction. It’s even easier with a disc wheel – the drive side will be on the right side of the hub as it’s facing you.
Start with a drive-side spoke and thread it through the hub. At this point, the head of the spoke faces inward while the elbow (the bent part) faces inward. Once the spoke is installed, slightly bend it to help alleviate excess tension.

Now it’s time to connect the spoke to the rim. The first spoke should be inserted into the second hole to the right of the valve. To clarify, that’s not the hole next to the valve hole (where the tape is); it is the next hole over.
Once the spoke is installed, put the spoke nipple onto the end of the spoke, covering roughly half the threads.
Repeat this process with your drive side spokes, installing a spoke in every other hole. When that process is complete, go back to the reference spoke (the first spoke you installed) and count four holes to the right. Install another spoke here, then move to the next spoke to the right. Count four holes over and install another spoke. Repeat until you have installed spokes all the way around the rim.
This is your first set of spokes, and now it’s time to install the other side. When you flip the wheel around, go to your reference spoke, which should now be on the left of the valve (because you flipped the wheel around). Now the process is very much the same.
Go to the flange hole (in the hub) on the non-drive side where you are working now, that is just to the right of the reference spoke. Install a spoke here, pushing it up into the rim just like you did before. Repeat the process from before by installing spokes into every other hole on the hub’s non-drive side. Continue until you have installed spokes all the way around the rim.
Now it’s time to re-position the wheel. Place the wheel non-drive side up, and install a drive-side spoke into each hole that is still open on the drive side of the hub.
Flip the wheel over, making sure that the inserted spokes stay flat with their elbows outside the flange. The next step of the process differs based on the type of wheel you’re making. Most bicycle wheels use a three-cross pattern, which means that each spoke crosses three spokes between the hub and the rim. This gives the wheel its tension, which we’ll get to in a minute.
With the newly installed spokes, start with any of them. The order does not matter here. Count out how many spokes this spoke will cross on its way to the rim, and ensure that each spoke follows that same crossing pattern.
In a three-cross wheel, for example, these spokes will cross over two spokes near the hub, and then one more spoke on its way to the rim. Once the first spoke is installed, count two holes over and install the new spoke. Continue installing spokes around the hub, making sure to cross over the same amount of spokes each time.
Before you flip the wheel over, make sure the recently installed spokes are fully inserted into the non-drive side flange of the hub.
Now it’s time to flip the wheel over and finish the last set of spokes. Repeat the same process as you did before, lacing the spokes and crossing them over the other spokes each time. Once this process is complete, you will have a fully-spoked wheel.
Tensioning and Truing the Wheel
There are two steps left in building this bicycle wheel before it’s ready to ride: tensioning and truing.
First, tension the wheel by tightening the spokes. This is best done by starting with each spoke nipple.
Zero the spoke nipples by tightening each of them to the point that its threads are no longer visible. There are some special tools for this, such as a nipple driver, which make the process much easier. You can also use a spoke wrench to zero the nipples.
Another crucial step in this process is to give each nipple an equal amount of turns. This helps balance out the tension in the bicycle wheel. We recommend turning the spokes 1-2 turns at a time to help even out the tension. Avoid tightening up one side before the other as this can lead to future complications.
It is best to check the tension with a spoke tension meter for the most accurate evaluation. Alternatively, you can squeeze the spokes with your hand to feel the tension. The spokes should still move, but feel tight to the touch. This gives your wheel structure and safety in riding.
Pro tip: adding a small amount of lube to the nipple/rim connection can help reduce friction and make maintenance much easier.
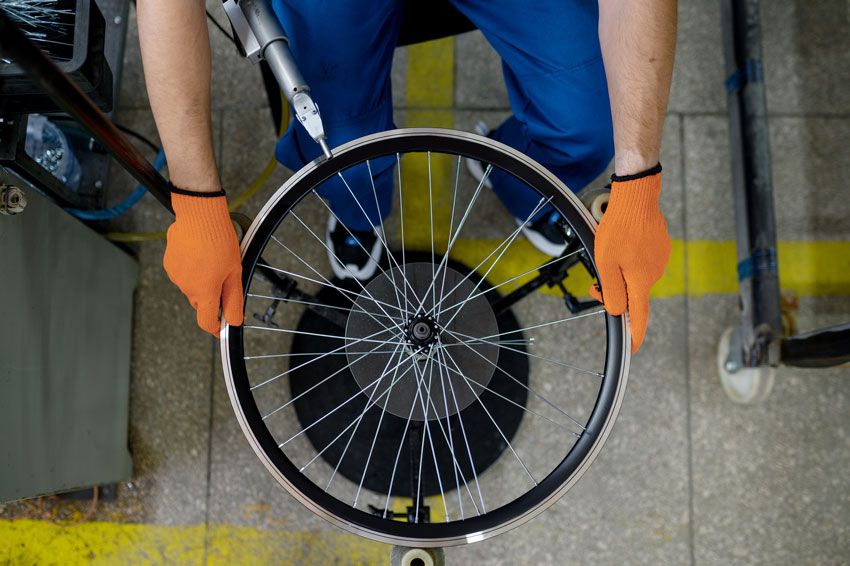
You’re almost there! Wheel truing is the final step in building a bicycle wheel. Truing is the process of adding even tension to the wheel so that it spins perfectly straight.
Use a truing stand and spoke tool for the easiest truing method. There are three main ways to true a bicycle wheel: lateral truing, radial truing, and checking the dish of the wheel. Each process helps even out the wheel’s tension, ensuring that it spins straight, maintains stability, and spins efficiently.
You may need to repeat the truing process once you’ve ridden on the wheel, which can stress the rim and spokes. But once the wheel is built, the truing process is very simple. Now you’ve built a bicycle wheel!
Is DIY Wheel Building Worth It?
Bicycle wheel building is not the most rewarding pastime. In fact, building your own road bike wheel or building an MTB wheel can actually be more expensive than buying a regular bicycle wheel. Wheel parts are expensive on their own, and that’s not even factoring in the time and labor that goes into building a bicycle wheel.
However, building a bicycle wheel at home is a hands-on experience like no other. When building a wheel by hand, you will learn to understand and feel the nuances of a bicycle wheel. You will get a feel for the exact spoke tension you prefer and how the wheel is built from the inside out.

The best bicycle wheel builders are specialists who have perfected their craft. Building a wheel is manageable for most at-home bike mechanics. On the other hand, building a great wheel takes time and experience. If you really enjoy bicycle mechanics and building things by hand, then bicycle wheel building could be for you.
Outside of the rim, hub, and spokes, there aren’t a ton of tools that you need to build a bicycle wheel. This is one of the biggest upsides to building a bike wheel. However, the parts on their own aren’t exactly cheap.
FAQ
Is it cheaper to build your own wheelset?
When building a bicycle wheel, the parts of the wheel are cheaper than buying a complete bicycle wheel. However, building your own bicycle wheelset isn’t always cheaper once you factor in the time, labor, parts, and tools necessary to complete the job. If you are an experienced bike mechanic, you can probably build a wheelset for cheaper than if you were to buy one from a bicycle shop.
What do you need to build a bicycle wheel?
The main things you need in order to build a bicycle wheel are a rim, hub, and spokes are the only parts that you need to build a bicycle wheel.
Past that, there are a number of tools that make that job much easier. For example, a truing stand and spoke wrench tool are some of the most helpful tools that you can use to build a bicycle wheel.
Other helpful tools include spoke tension meters and dish meters. Altogether, these tools aren’t expensive individually.
And if you’re planning on building multiple bicycle wheels, they could well be worth the investment.
How hard is it to build a bicycle wheel?
Building a bicycle wheel is a relatively simple process that takes time and precision. Using our guide above, almost any at-home bike mechanic can learn to build a bicycle wheel.
As long as you have the right tools, it doesn’t take much expertise to build a bicycle wheel. However, building a great bicycle wheel takes some experience. With a few wheels to practice, you quickly learn how much spoke tension to apply, and the exact lacing of each spoke.
How to build a bicycle wheel?
Wheelbuilding is a fairly simple process that involves three main parts: the rim, hub, and spokes. Our guide above lays out the entire process from beginner to end.
In summary, the steps to wheel building are installing the spokes into the hub, connecting each spoke to the rim, and lacing the spokes amongst one another.
Lastly, you need to tighten the spokes and true the wheel to complete your bicycle wheel build.
Is it cheaper to buy a bike or build it?
In general, it is cheaper to buy a basic bicycle instead of building it. Basic bicycles are affordable hybrids and road bikes that you can find for around $500 and $1,000.
Building a bicycle requires a lot of parts and even more expertise. An experienced bicycle mechanic may be able to build a bike for cheaper than if they were to buy it.
Wheelbuilding and bike building are great for experienced bicycle mechanics who enjoy the building process. They might even be able to build a bike for cheaper than buying one.